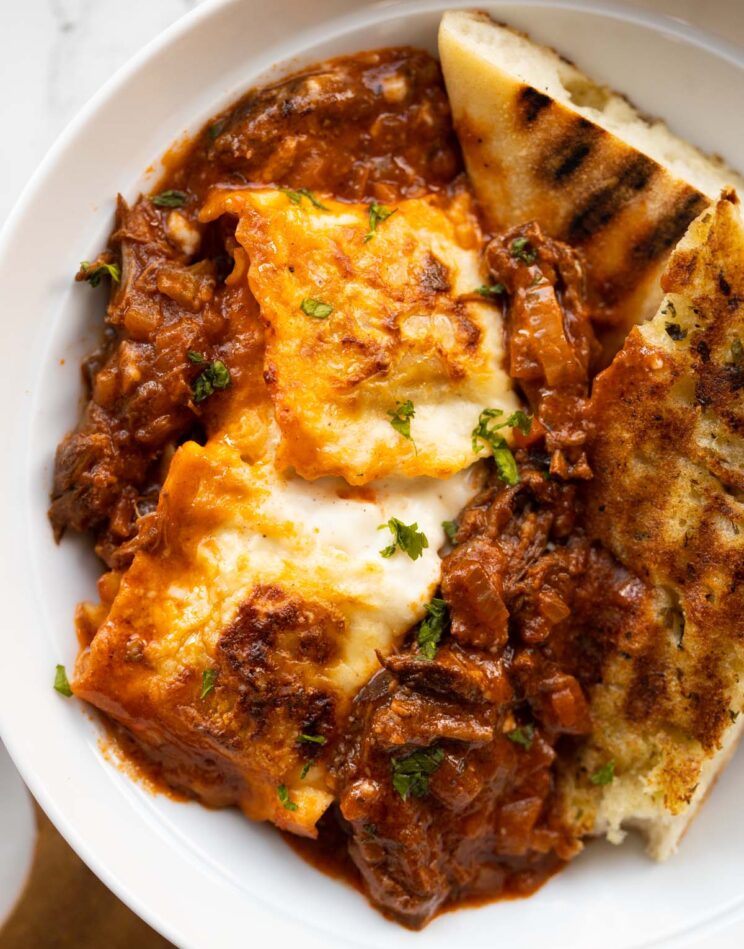
A rich and tender beef ragu baked with cheesy ravioli – this truly is what comfort food is all about!
This is the kind if ‘stick to your ribs’ kinda comfort food. It’s really filling, really hearty and incredibly delicious! Follow me…
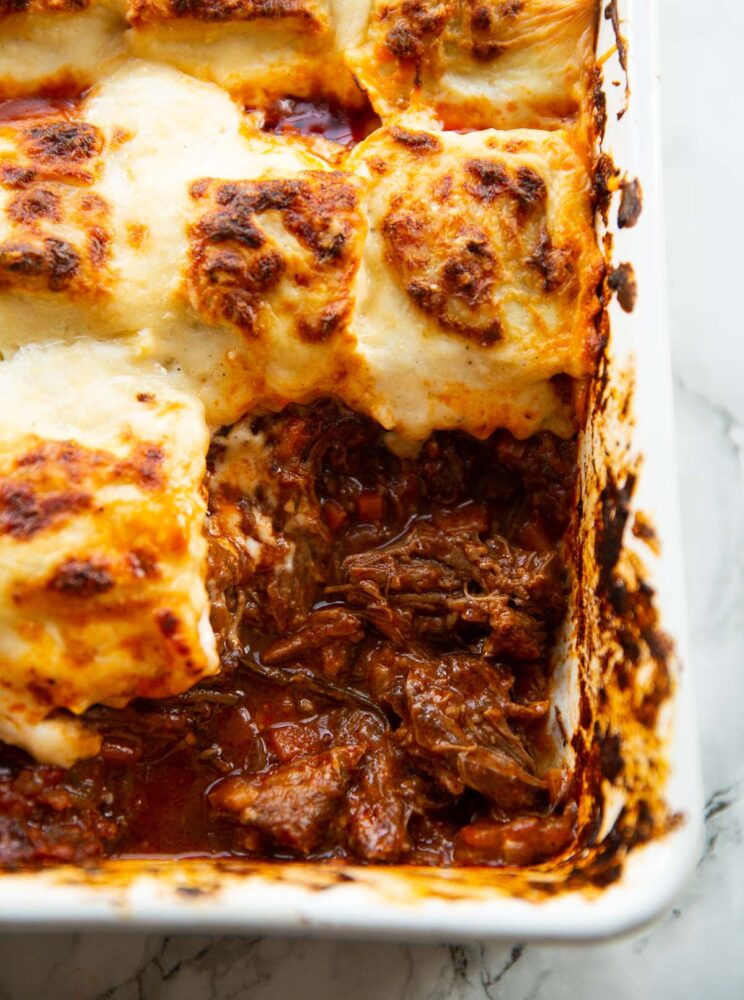
Beef Ragu
For the filling, we’re going to make a rich and tender beef ragu. It’s the kind of thing you’d typically serve with pappardelle, but here we’re baking it underneath some cheesy ravioli (more on that in just a sec).
What kind of beef should I use?
You’ll want to use a cut that’s suitable for slow cooking i.e. beef chuck. You’re looking for a cut that’s marbled with fat as this will give you maximum tenderness. You’ll find cuts of beef that are suitable for slow cooking in most supermarkets.
Preparing the beef
To prep the beef I typically pat it dry. This not only makes it easier to handle, but it will also help the beef form a crust when you fry it. From there, you’ll want to slice it into even-sized chunks and heavily season it. Some recipes will skip the frying, but I find the extra bit of flavour it develops is always worth the extra 5 minutes!
Simmering the beef
We’ll very gently simmer the beef in the sauce on the stove. I do this mostly with the lid on, but then remove it towards the end to help reduce and thicken the sauce.
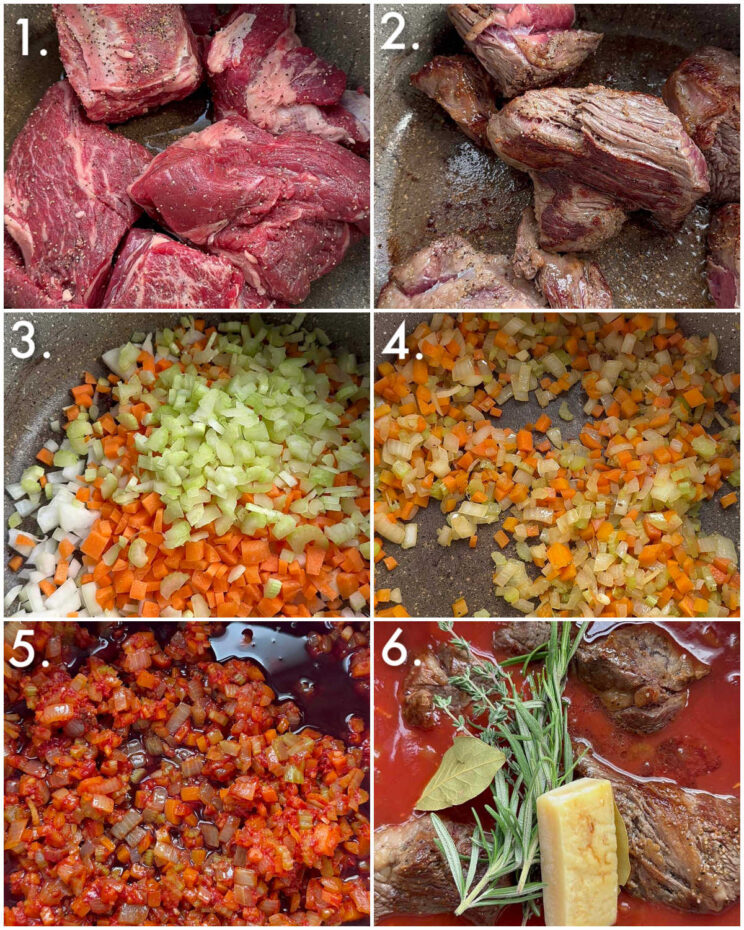
Process shots: prepare and fry beef (photos 1&2), fry onion, carrot, celery, garlic (photos 3&4), stir in tomato puree and red wine (photo 5), add passata, beef stock, bay leaves, rosemary, thyme, parmesan rind, beef + resting juices (photo 6).
Shredded Beef Ragu
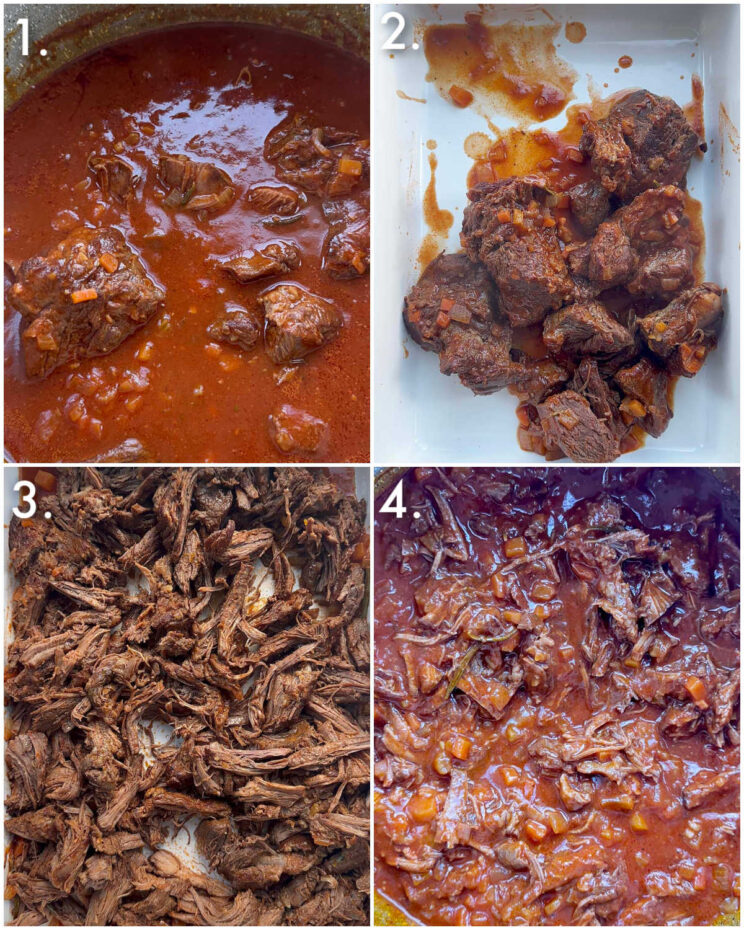
Once you’ve simmered the beef you can then remove and shred it. Don’t over-shred in the first instance or it’ll turn mushy. From there, it goes back in the sauce and we can crack on with the ravioli section.
How do I know when the beef is cooked?
You can easily test it by using two forks to gently pull it apart. It should fall apart fairly easily, although it will continue cooking in the oven for a little longer. The sauce should also be fairly thick, but still just about cover the beef.
Process shots: simmer beef (photo 1), add beef to baking dish (photo 2), shred (photo 3), add back to sauce (photo 4).
Bechamel Sauce
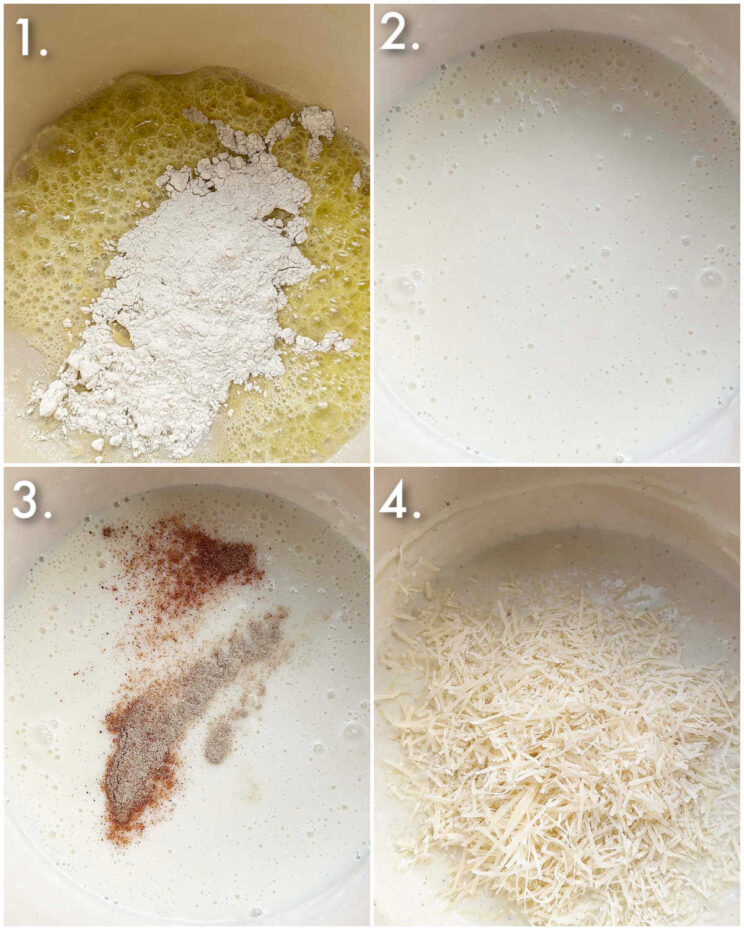
Alongside the ravioli, we’re going to whip up a bechamel sauce to go on top. This is made up of 4 components:
- Butter & Flour – to create a roux to thicken the sauce.
- Milk – the base of the sauce (I use semi-skimmed).
- Seasoning – I love adding ground nutmeg, alongside salt and white pepper.
- Parmesan – how could we not?!
Process shots: melt butter and stir in flour (photo 1), whisk in milk (photo 2), add seasoning and simmer (photo 3), stir in parmesan (photo 4).
Ravioli Bake
Okay, here’s where the fun begins.
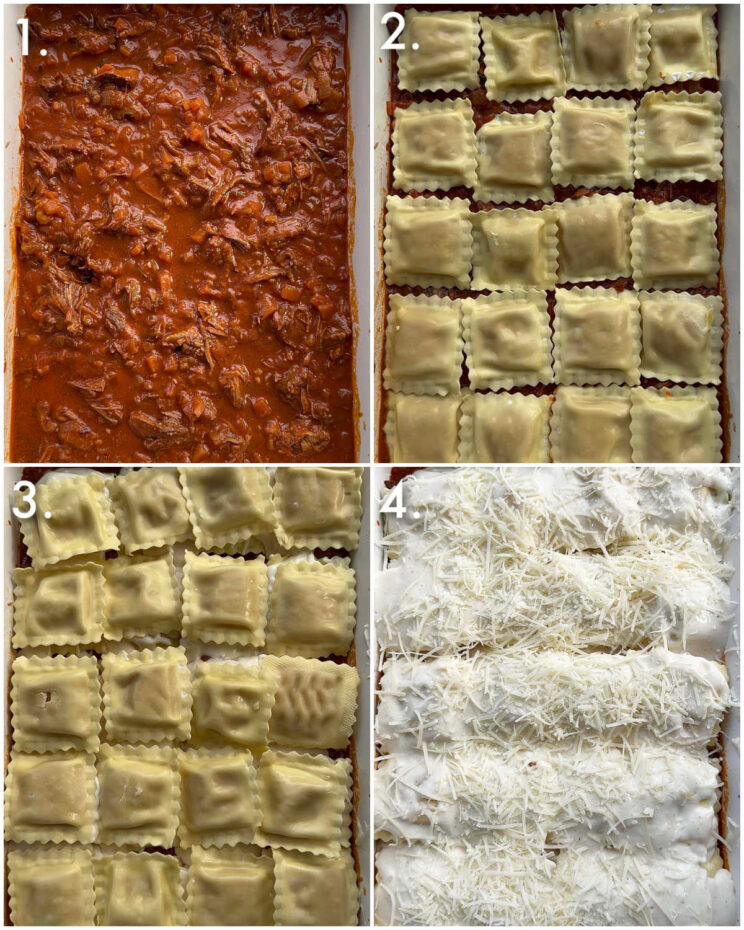
The bottom layer is the beef ragu, then you’ll want to top it with a layer of ravioli. From there you can go in with a layer of bechamel and another layer of ravioli. You’ll want to finish with more bechamel and a good helping of parmesan.
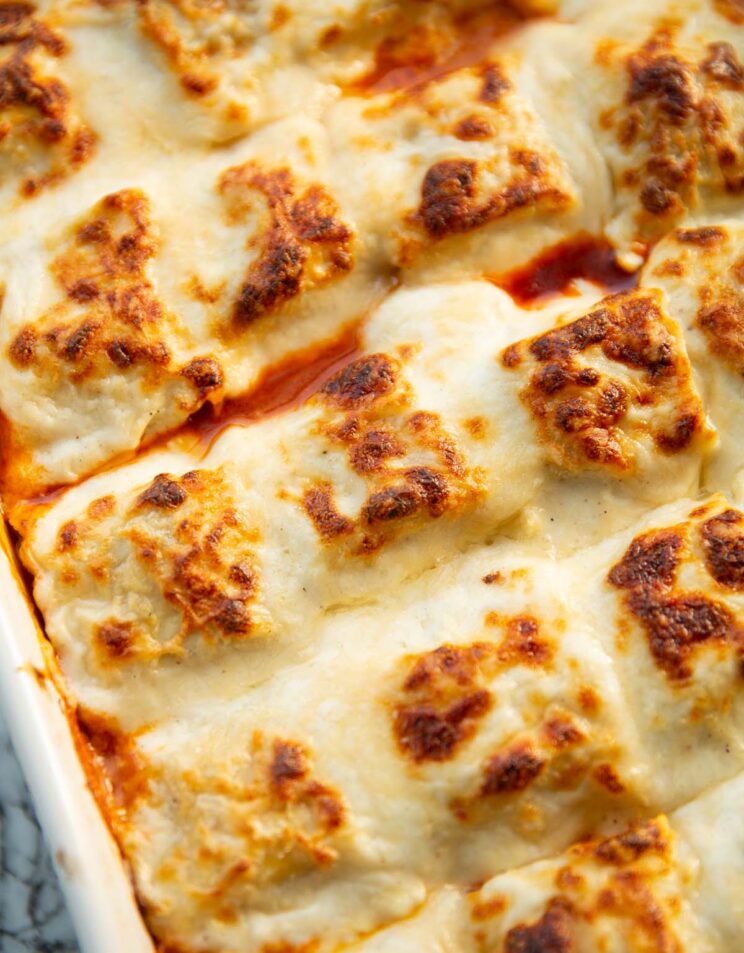
It won’t take long in the oven – 20 minutes or so works a charm! I don’t recommend covering it because you lose out on the gorgeous crispy topping.
What kind of ravioli should I use?
You can experiment with your favourite fillings! I’d steer away from meat/beef ragu fillings as that’s what is underneath. Some form of cheese ravioli is always a safe bet. I also like aubergine parmigiana filling!
Process shots: add ragu to baking dish (photo 1), add ravioli (photo 2), add bechamel and more ravioli (photo 3), add bechamel and parmesan then bake (photo 4).
Beef Ravioli Bake FAQ
Do I have to cook the ravioli?
Nope! It soaks in enough sauce as it bakes to come out perfectly al dente.
Can I prep this ahead of time?
I typically make the ragu and let it completely cool in the dish, then cover and store it in the fridge. I then bring it close to room temp and carry on with the rest of the recipe the day after.
How do I store leftovers?
Any leftovers just tightly store in the fridge for 3-4 days and nuke in the microwave until piping hot again.
Serving Beef Ragu Ravioli Bake
You’ll want to let it rest for 5 or so minutes before digging in, just to allow the ravioli to finish sucking in the sauce (and for the bubbling to stop so you don’t lose the roof of your mouth!). From there I highly recommend serving with some Garlic Bread as there will be plenty of ragu.
Alrighty, let’s tuck into the full recipe for this beef ragu ravioli bake shall we?!
How to make Beef Ragu and Ravioli Bake (Full Recipe & Video)
Beef Ragu and Ravioli Bake
Equipment
- Sharp Knife & Chopping Board
- Large Deep Pot with Lid
- Tongs & Wooden Spoon
- Cheese Grater
- Medium Sized Pot & Whisk (for bechamel)
- Large Baking Dish (mine is 12x9" / 30x22cm)
- Serving Spoon
Ingredients
Ragu
- drizzle of Olive Oil
- 1.1kg / 2.4lb Beef Chuck (see notes)
- 1 tsp Salt
- 1/2 tsp Black Pepper
- 2 medium Carrots, finely diced
- 2 medium ribs of Celery, finely diced
- 1 large White Onion, finely diced
- 3 cloves of Garlic, finely diced
- 75g / 1/4 cup Tomato Puree (Tomato Paste in US)
- 180ml / 3/4 cup Dry Red Wine
- 500ml / 2 cups Tomato Passata (Pureed Tomatoes in US)
- 500ml / 2 cups Beef Stock
- 2-3 large sprigs of Fresh Thyme
- 2 Bay leaves
- 1 large sprig of Fresh Rosemary
- 1 Parmesan Rind
- 1/2 tsp Sugar, or to taste (helps balance out any acidity from the tomatoes)
Ravioli
- 500 / 1lb uncooked Fresh Ravioli (see notes)
- 30g / 1oz EACH: Butter, Plain Flour
- 500ml / 2 cups semi-skimmed or whole Milk, at room temp (plus a dash more if needed)
- 40g + 30g / 1/2 + 1/3 cup freshly grated Parmesan, (30g/1/3 cup is to top)
- 1/8 - 1/4 tsp EACH: Salt, Pepper (preferably white) and Ground Nutmeg
Instructions
- Slice the beef into 4-5 even-sized pieces and trim off any large bits of fat. Season all over with salt and pepper.
- Add a drizzle of oil to a large deep pot over high heat. Sear the beef until browned all over then remove and place in a bowl to one side. 5 or so mins should suffice - don't try and cook them through at this point, just caramelise the outside.
- Lower the heat slightly to medium-high and add in the carrot, celery and onion. Fry until it all begins to soften and lightly colour, then add in the garlic and fry for a minute longer. Stir in the tomato puree and fry for a minute, then pour in the wine and use your wooden spoon to scrape off any flavour from the base of the pan.
- Pour in the stock and passata, then add in the parmesan rind, bay leaves, thyme, rosemary, sugar and cooked beef (alongside all the resting juices). Give it a stir and bring to a simmer, then reduce the heat to low and pop on the lid.
- Allow to gently bubble away for 1 hour 30 minutes with the lid on, then remove the lid and continue gently simmering for another 45-55 minutes, or until the sauce has thickened and the beef is tender enough to shred with two forks.
- Remove the beef and place in a large baking dish, discarding the herbs and parmesan rind as when you find them. Roughly shred the beef then stir in back through the sauce. Check for seasoning, then add back to the baking dish and level off with a wooden spoon. Leave to sit as you make the bechamel sauce. Preheat the oven to 190C/375F.
- Melt the butter in a medium-sized pot over medium heat. Stir in the flour to create a roux, then gradually add in the milk, whisking as you go to ensure no lumps form. Add in salt, pepper and nutmeg (can adjust later) then bring to a simmer. Allow to gently bubble away for 5 minutes until the sauce thickens, stirring regularly. Stir in 40g / 1/2 cup parmesan then check for seasoning and remove from the heat.
- Layer over half of the ravioli on top of the ragu, then top a little under half of the bechamel sauce (if it has thickened a lot you can loosen it up with a splash of milk). Repeat, then finish with 30g / 1/3 cup parmesan to cover the top.
- Bake in the oven for 20 minutes, or until golden/very lightly charred and bubbly around the edges. Leave to rest for 5 or so minutes before diving in!
Video

Notes
Your Private Notes:
Nutrition
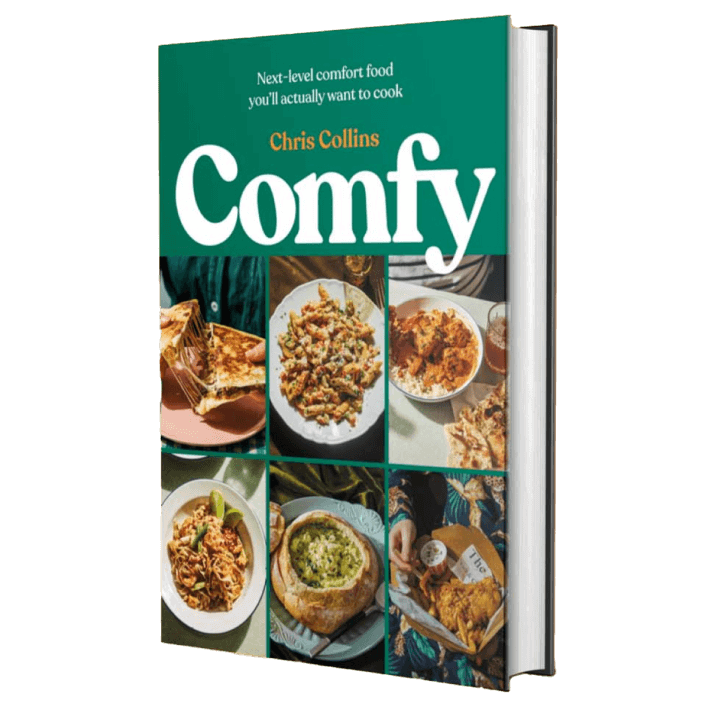
Looking for more?
You’ll find plenty more delicious comfort food like this in my Debut Cookbook ‘Comfy’


Absolutely delicious. I did an alternate mix of cheese and beef ravioli. Very easy to make with maximum impact! Another great recipe to make again and again. Thank-you. Loving the cookbook too
So pleased this went down well and great to hear you’re loving the book 🙂 C.
Soooo delicious I LOVE these recipes!! Cooking is fun again
Thanks so much for the review, Jen! 🙂 C.