Here I’ll share with you one of the easiest and most delicious ways to serve cod for dinner!
If you’re ever stuck for ideas on how to serve fish for a quick and easy dinner, this recipe is a no-brainer. Follow me…
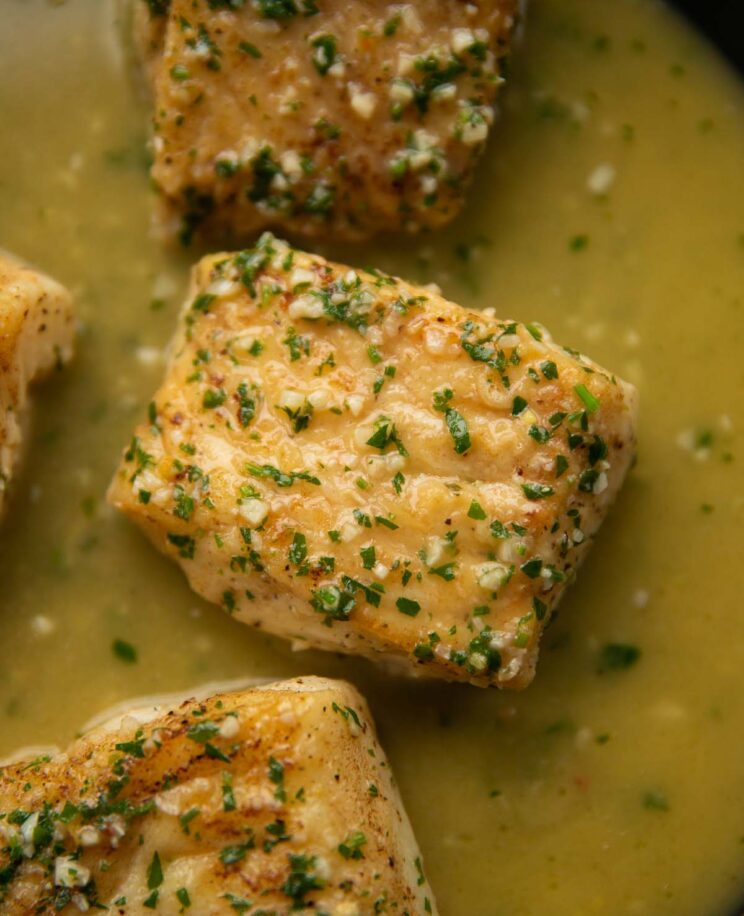
Pan Fried Cod
Baking is a great option for cod, as is poaching and steaming. However today we’re going to pan-fry it. The sauce is made in the pan, so it makes sense to cook the cod in there too. Pan frying the cod also ensures you get a nice golden coating on it.
What kind of cod should I use?
I use cod fillets but you could use cod loins if you’d prefer. You’ll want to make sure the cod is skinless and boneless too.
Dredging the cod through flour
I love giving the cod a light coating of seasoned flour before frying it. This will help it build up a thin golden crust, which in turn helps absorb the sauce and encourage it to stick to the cod.
Pan-frying the cod
I use a combination of butter and oil; the butter adds a rich flavour, whilst the oil helps prevent the butter from burning. You’ll want to use a non-stick pan – cod is very delicate and can break apart if it sticks to the pan.
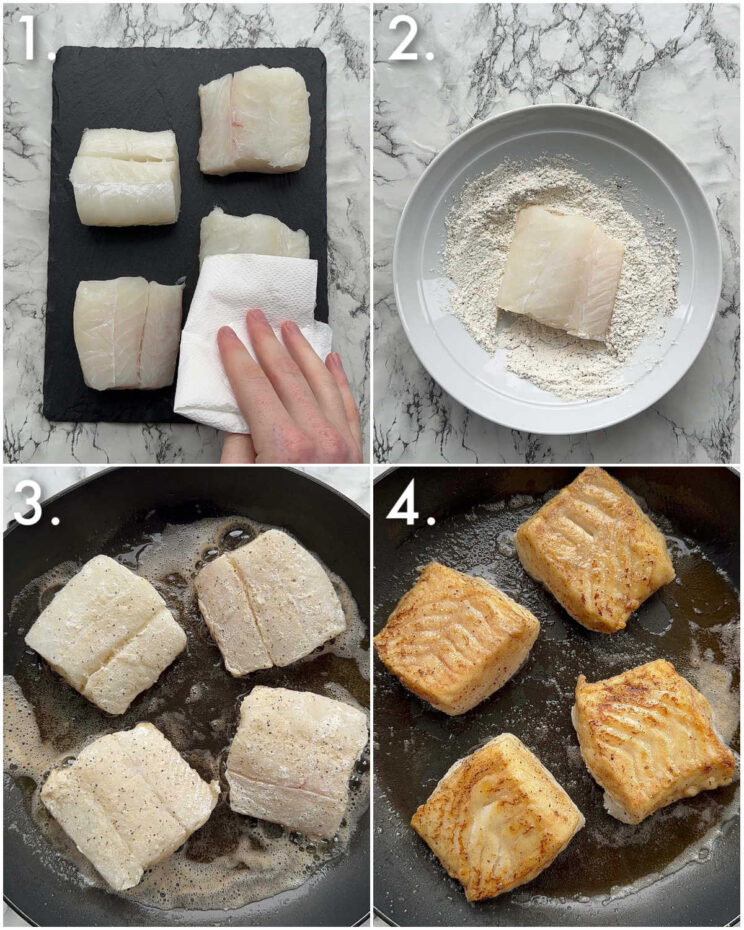
Process shots: pat the cod dry (photo 1), coat in seasoned flour (photo 2), fry both sides then remove (photos 3&4).
Garlic Butter Sauce for Cod
The sauce is incredibly simple and consists of 4 main ingredients:
- Garlic – This must be fresh. Don’t use the pickled jarred stuff, it’ll throw off the flavour.
- Butter – I like to use unsalted butter to gain more control over the seasoning of the sauce.
- Stock – I opt for vegetable stock for more of a neutral flavour to blend with the cod.
- Parsley – For an extra pop of flavour and colour.
I also like to incorporate the resting juices from the cod for an extra boost of flavour. But I guess this is more of a ‘free’ ingredient!
Sauce consistency
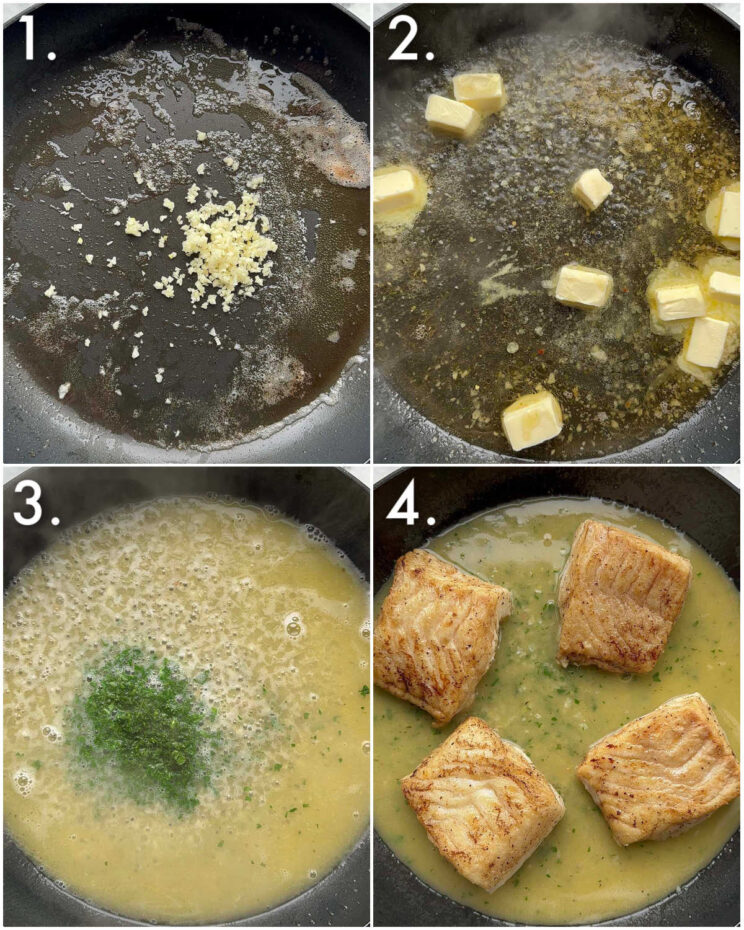
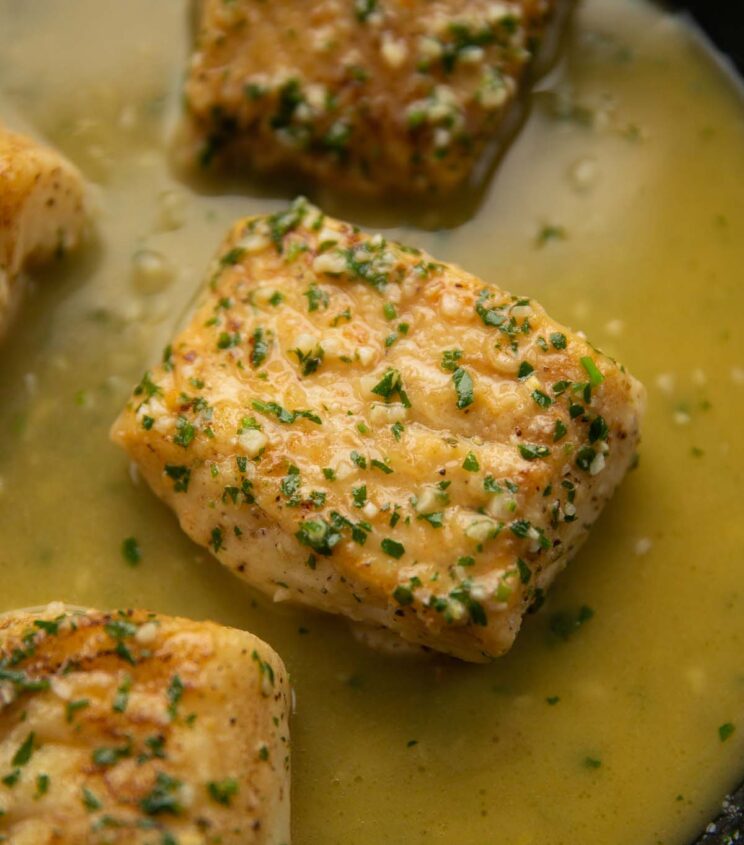
The sauce shouldn’t take long to thicken, just gently simmer and stir away and as the stock reduces, you’re left with a nice glossy, buttery sauce. The sauce might be quite thin at first, but when you add the cod back in, the floured exterior helps thicken the sauce.
Process shots: very garlic (photo 1), add stock and butter (photo 2), melt butter then add parsley (photo 3), simmer then add cod (photo 4).
Garlic Butter Cod FAQ
How do I know when the cod is cooked?
The flesh should be opaque right the way through. It should also easily flake with a fork.
How do I prevent the cod from overcooking?
Definitely stay on the side of caution when you fry it because it’ll carry on cooking slightly as it rests and when added back to the pan. It’s always better to have it slightly undercooked as you can simmer it for a couple of minutes to finish it off if you need to. If in doubt, just gently ply open the centre with two forks to check the doneness.
How garlicky is the sauce?
It does end up fairly garlicky, which may be surprising as you’re only using 2 garlic cloves and some garlic powder in the batter. Even if you absolutely love garlic, I’d stick with the measurements provided, at least for the first time.
Can I use a different protein instead?
The sister recipes to this is my Garlic Butter Pork Chops, Garlic Butter Salmon and Garlic Butter Chicken so do give them a go if you fancy!
Serving Garlic Butter Cod
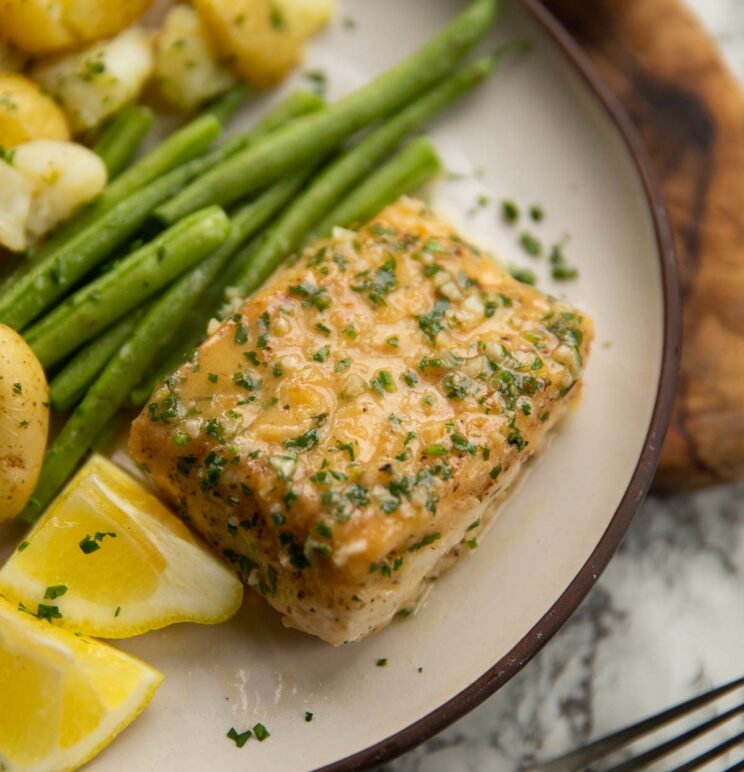
When it comes to serving the salmon, you’ll want to add a lemon wedge to each plate. A squeeze of lemon juice will cut through the richness of the sauce and finish everything off nicely. Here I’ve served with some boiled baby potatoes alongside some green beans, but check out my Side Dishes for more inspo!
Alrighty, let’s tuck into the full recipe for this garlic butter cod shall we?!
How to make Garlic Butter Cod (Full Recipe & Video)
Garlic Butter Cod
Equipment
- Sharp Knife & Chopping Board
- Kitchen Roll/Paper Towels
- Large Shallow Dish (for dredging cod)
- Large Non-Stick Pan & Plastic Turner/Spatula
- Wooden Spoon
- Jug (for stock)
Ingredients
Cod
- 4x 120-150g/4-5oz boneless skinless Cod Fillets (see notes)
- 35g / 1/4 cup Plain Flour
- 1 tsp EACH: Salt, Garlic Powder
- 1/2 tsp Black Pepper
- 1 tbsp Olive Oil
- 1 tbsp / 15g Unsalted Butter
Sauce
- 2 cloves of Garlic, finely diced
- 120ml / 1/2 cup Vegetable Stock
- 5 tbsp / 75g Unsalted Butter, diced into chunks
- 1 tbsp finely diced Fresh Parsley
- 1 Lemon, divided into 4 to serve (don't skip this!)
Instructions
- In a large shallow dish combine the flour, salt and pepper. Use kitchen roll to gently pat the cod dry and remove excess moisture. Take a piece of cod, coat it in the seasoned flour then give a shake/pat then place to one side. Repeat with the remaining fillets.
- Heat 1 tbsp oil and butter in a large non-stick pan over medium-high heat. Place in the cod and fry for 2-3 minutes on each side, or until light golden on the outside and just about opaque through the centre. Timings will depend on the thickness of the fillets, but I recommend being cautious as the cod will carry on slightly as it rests and when added back to the pan.
- Remove the cod and place it on a plate to one side, then lower the heat to medium. Add the garlic and fry for 30 seconds or so (careful it doesn't burn) then pour in the stock. Swiftly stir in the butter until it melts and turns the stock cloudy, then add the parsley.
- Simmer and stir fairly frequently for a few minutes until the sauce begins to thicken. Season to taste then stir in the resting juices from the cod. Turn the heat to low, add the cod and baste in the sauce to warm it through and finish cooking it through if needed. The excess flour from the cod will slightly thicken the sauce further.
- Serve with a squeeze of lemon juice and enjoy!
Video
Notes
Your Private Notes:
Nutrition
Looking for more?
You’ll find plenty more delicious comfort food like this in my Debut Cookbook ‘Comfy’


This recipe was delicious! I did modify the sauce slightly and added a little Dijon mustard, red chilli oil, ginger, and dash of Agave. Came out so buttery flaky and really really tasty! Simple ingredients always make the best recipes.
Thanks so much for the review, Jay! So pleased it turned out well 🙂 C.
2nd time cooking this & it tastes amazing. We love fish so a great recipe!
Thanks so much for the review, Sue! 🙂 C.
Another recipe the whole family loved! Delicious 🙂
Thanks so much Emma! 🙂 C.
Another fantastic recipe. Delicious.