These taco pockets are fun to make and delicious to eat!
If you can resist eating the entire batch of these you’re a much better person than me. And I’m speaking from experience! Not only are these tacos incredibly tasty, they’re also really simple to make too. Follow me…

Beef Taco Filling
The filling is easy and relatively quick to whip up. You only need a handful of ingredients too:
- Onion & Garlic – These add a base flavour.
- Beef – I recommend using lean beef so the pockets don’t end up too oily.
- Tomato Puree – Adds flavour and thickens everything up.
- Seasoning – I use a homemade taco seasoning but you can use a sachet of store bought if you prefer.
- Water – Keeps the filling nice and juicy.
You’ll want to let the filling cool a little before you add it to the tacos, just so they don’t steam them from the inside and cause them to unwrap.
Process shots: fry onion (photo 1), fry garlic (photo 2), fry beef (photo 3), stir in seasoning (photo 4), stir in tomato puree (photo 5), stir in water (photo 6).

How to fold Taco Pockets
In hindsight, are these more like mini quesadillas? Potentially. But we’re using a taco-style filling and we’re in too deep now. Taco pocket it is.
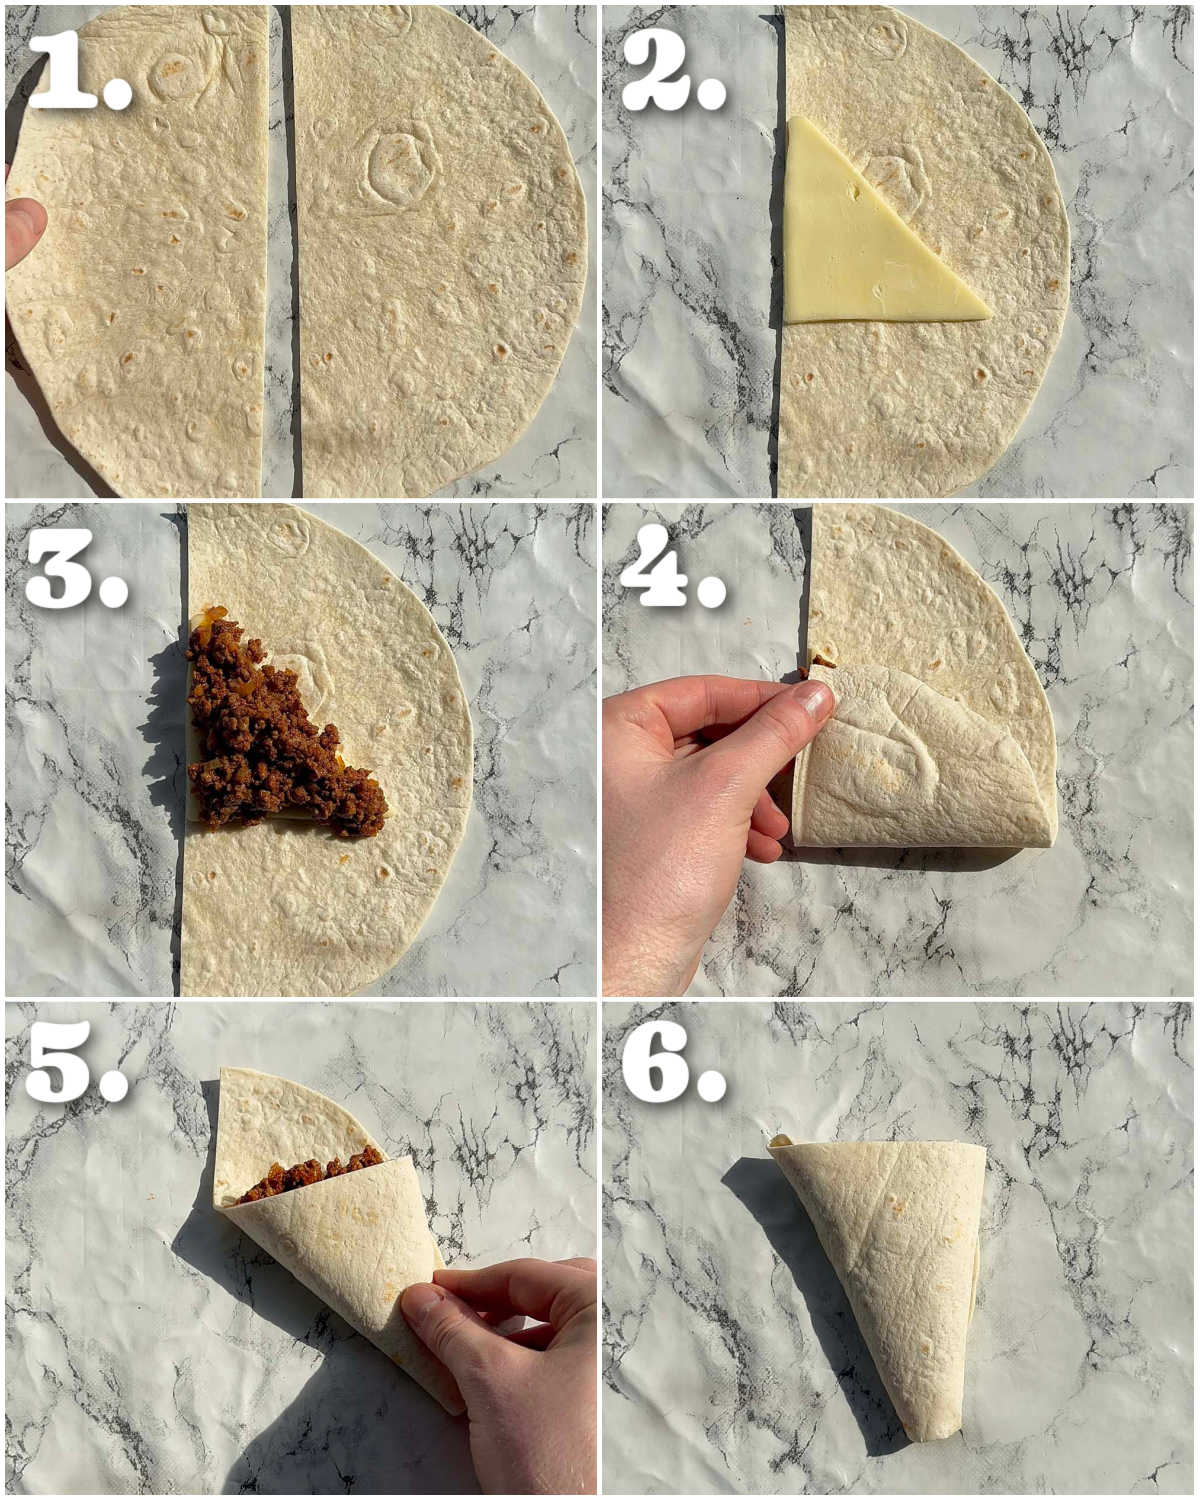
To make the pockets, just halve a flour tortilla, add half a square of cheese and plonk on the beef. From there, you fold the whole thing into a triangle-shaped pocket. Pretty neat right?
Process shots: halve tortilla (photo 1), add cheese (photo 2), add beef (photo 3), fold up the bottom of the tortilla to cover the filling (photo 4), fold everything over to the right (photo 5), tuck in the end (photo 6).
Recipe Tip
Try folding the wrap with no filling inside it, just to get the hang before you try it with the filling. After you try the first couple you’ll get the hang on things – promise!
How to cook Taco Pockets
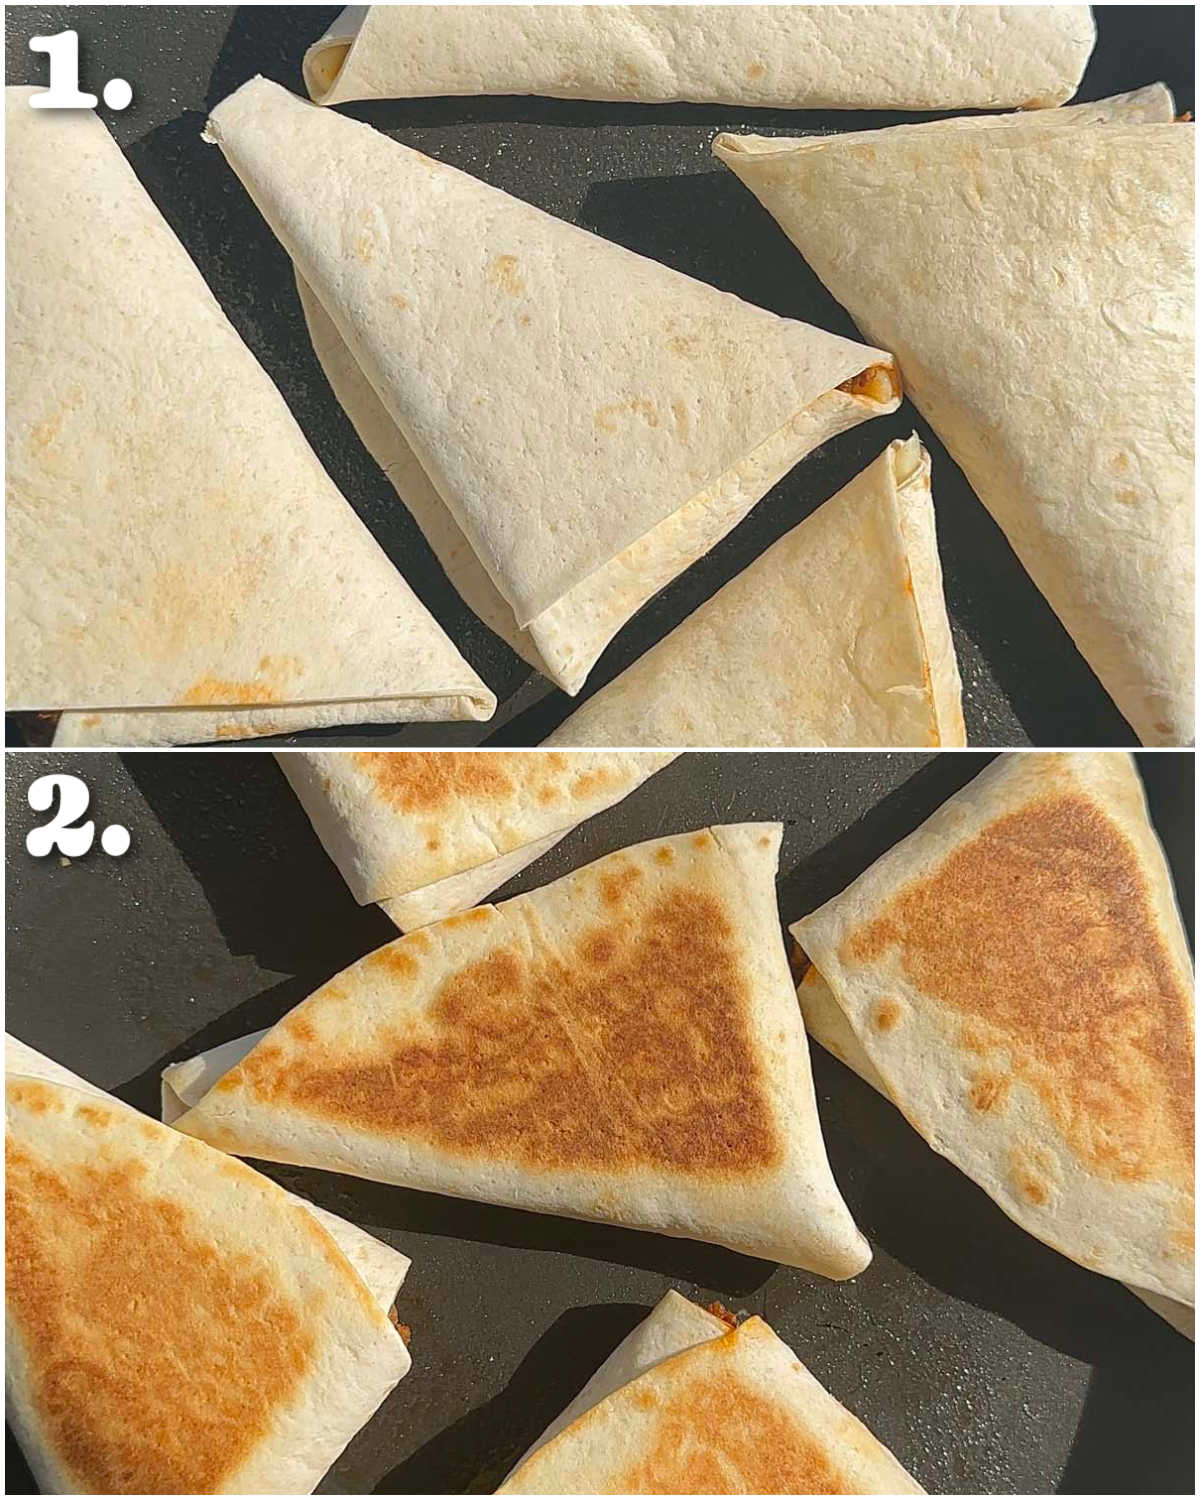
I did originally test these in the air fryer and oven, but found that pan-frying them gave the best results. I found the pockets were more prone to unwrapping in the oven/air fryer. They also came out more ‘dry’, as opposed to ‘crispy’. I only needed to pan-fry them in two batches as well, so it actually ended up being a fairly quick option too.
To fry the pockets, just add them to a large pan over medium heat and toast both sides until crispy. I like to spray them with a little oil, but frying in a dry pan will work just fine.
Because the filling is cooked, you’re really just focusing on getting a nice crispy exterior and ensuring the cheese melts.
Process shots: add pockets to pan (photo 1), fry both sides (photo 2).
Taco Pockets FAQ
I like using Cheddar, but any sort of melty cheese will work (Monterey Jack, Mexican Cheese Blend etc).
Yes! Just make sure the filling completely cools before you make the pockets. Just tightly store them in the fridge them pan-fry when ready to eat (more on this in the recipe card below).
If you’ve already pan-fried them just allow them to completely cool then tightly store in the fridge. You can then reheat in the air fryer or oven (more on this in the recipe card below).
Yes! If they have already been pan-fried you can reheat in the oven or air fryer from frozen. If they haven’t just thaw them in the fridge then pan-fry (more on this in the recipe card below).
Serving Taco Pockets
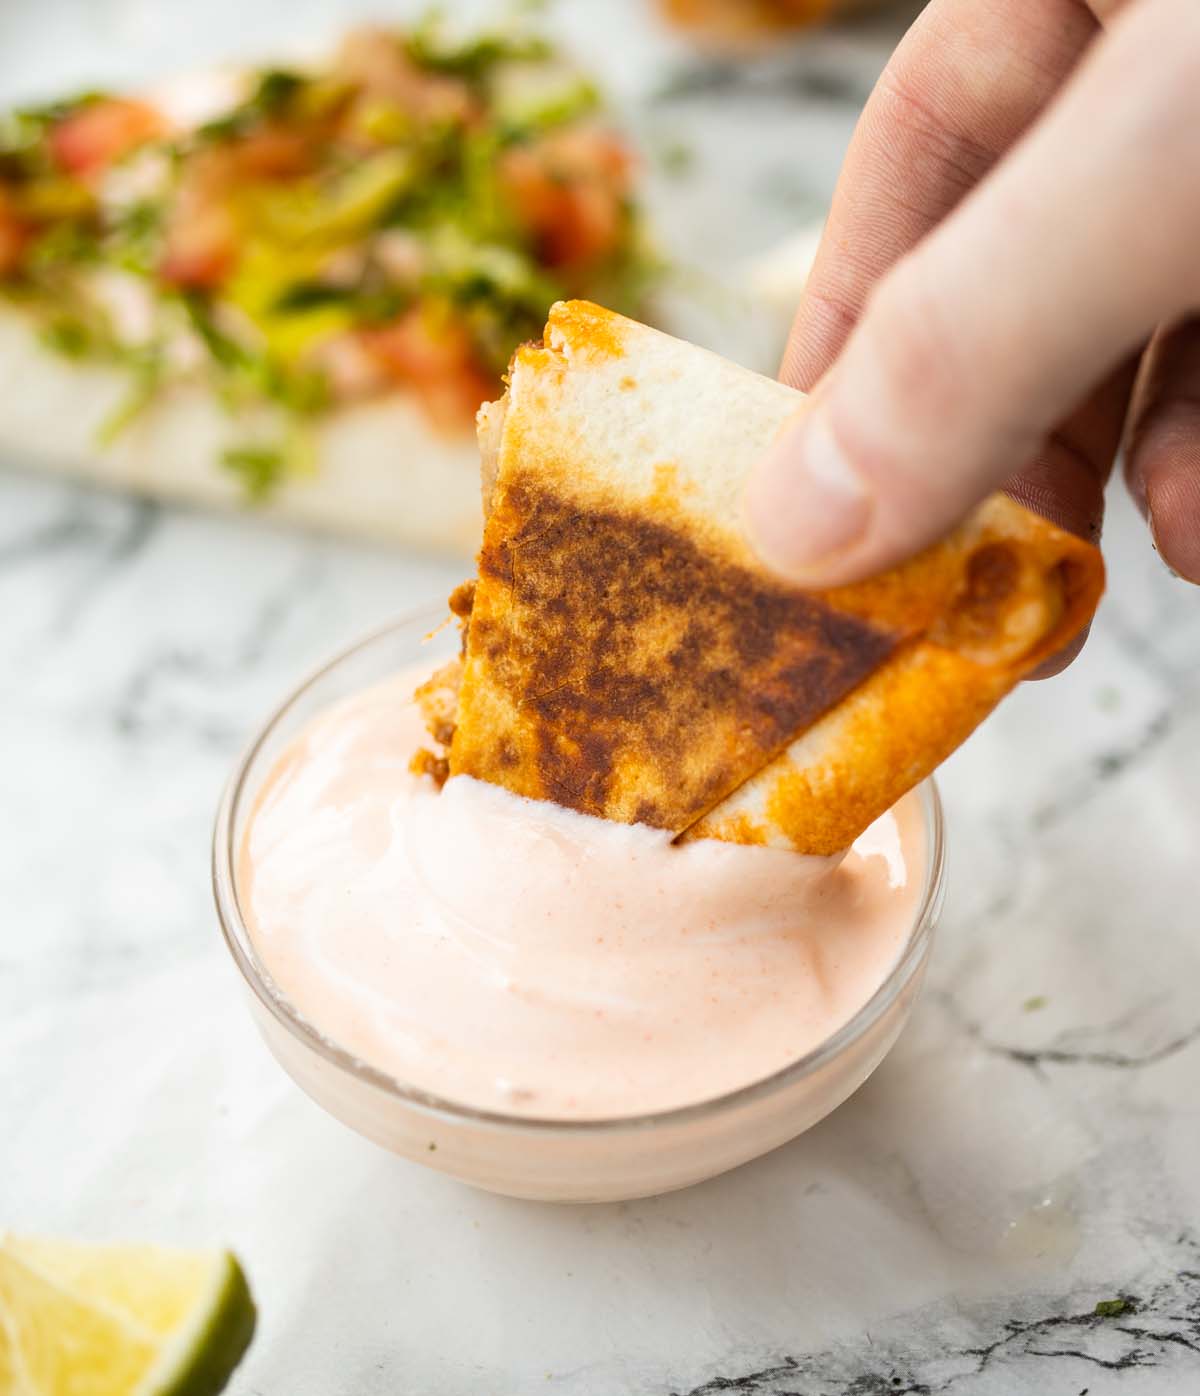
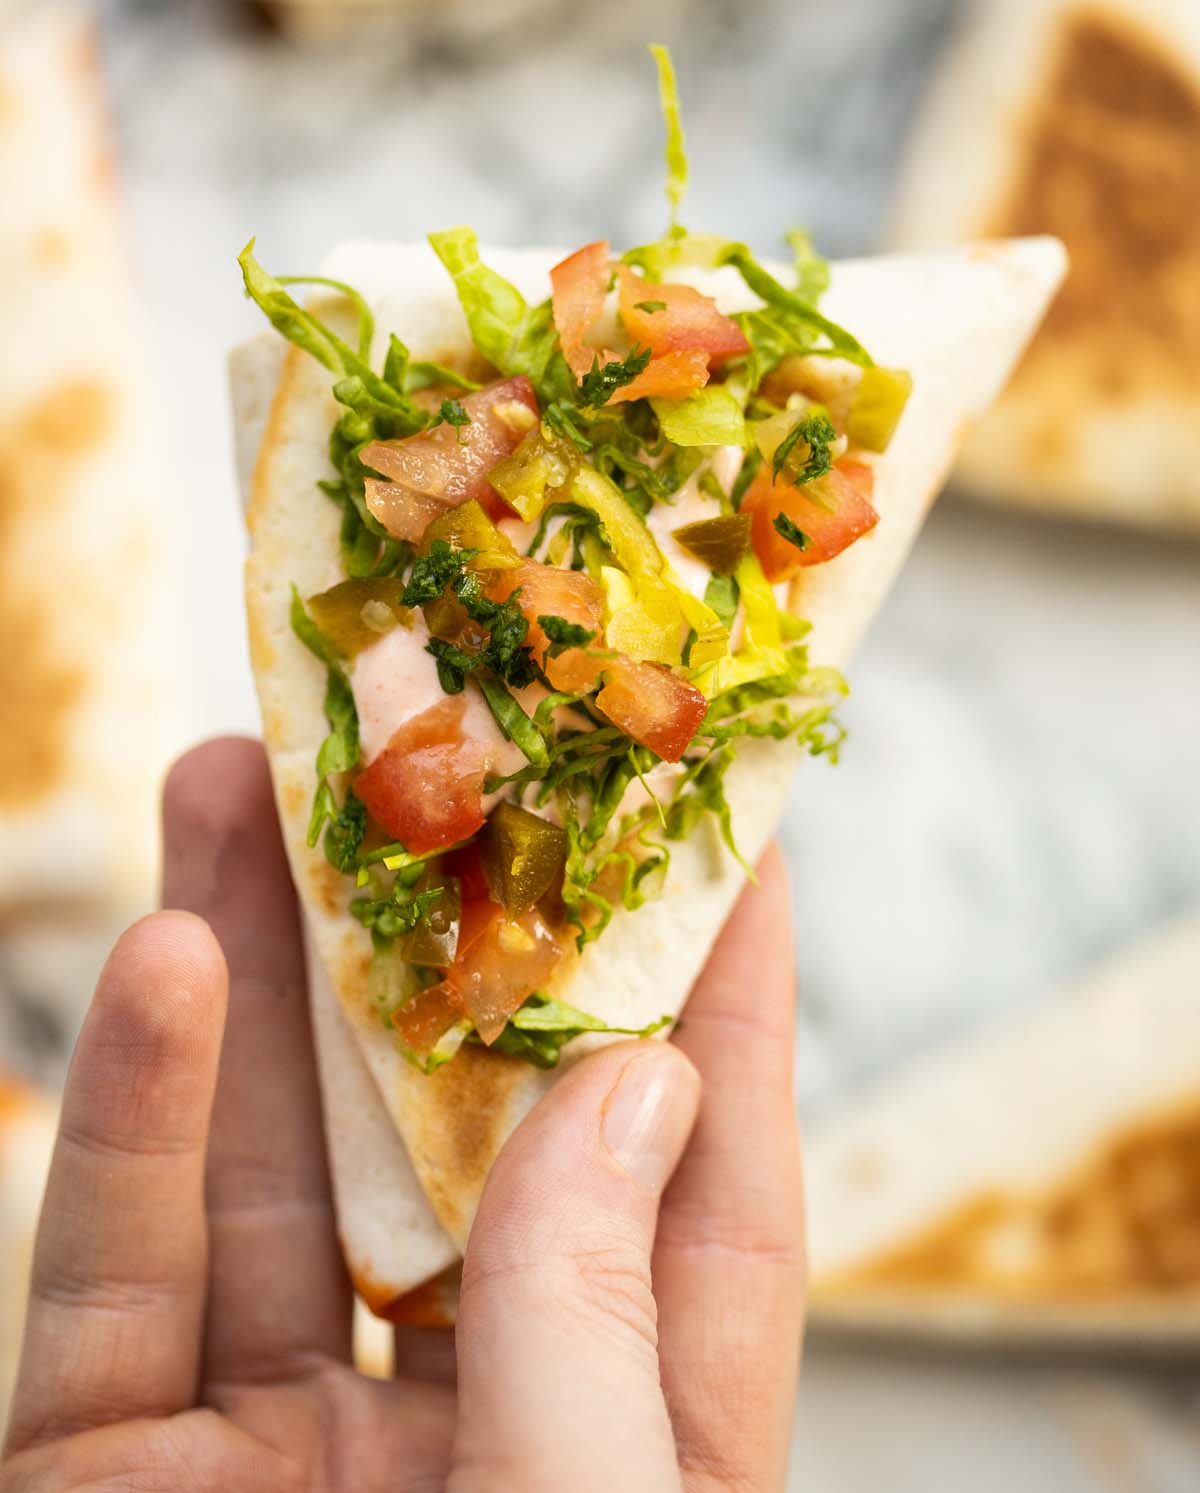
At their most basic you can serve these up with a dip (I make one by mixing sour cream and sriracha). However, for the full taco experience, I like to dollop the sauce on top with my favourite taco toppings. Here I’ve used lettuce, tomato and jalapeño because that’s what I had on hand.
For another funky taco ‘hack’ check out my Upside Down Puff Pastry Tacos!
For another tortilla pocket recipe check out my Breakfast Pockets!
Alrighty, let’s tuck into the full recipe for these taco pockets shall we?!
How to make Taco Pockets (Full Recipe & Video)

Taco Pockets Recipe
Equipment
- Sharp Knife & Chopping Board
- Large Pan & Wooden Spoon
- Spatula/Turner
Ingredients
Filling
- drizzle of Olive Oil
- 1 medium Onion, finely diced
- 2 cloves of Garlic, finely diced
- 500g / 1lb lean Minced/Ground Beef
- 2 tsp EACH: Paprika, Cumin
- 1 tsp Oregano
- 3/4 tsp Salt, or to taste
- 1/2 tsp EACH: Onion Powder, Garlic Powder, Sugar, Cayenne Pepper (halve the cayenne for mild spice)
- 1/4 tsp Black Pepper
- 1 heaped tbsp Tomato Puree (Tomato Paste in US)
- 2-3 tbsp Water
Tacos
- 5x 9-10" Flour Tortillas, halved
- 5x square slices of Cheddar, diagonally halved
- Oil Spray, as needed
- 1x 150g/5oz pot of Sour Cream
- 2-3 tbsp Sriracha
- Your Favourite Taco Toppings (see notes)
Instructions
- Add a drizzle of oil to a large pan over medium heat. Add the onion and fry until soft and golden, then add the garlic and fry for another 30 seconds or so. Add the beef and fry until completely browned, breaking it up with your wooden spoon as you go.
- Stir in all of the seasoning then stir in the tomato puree and fry for a minute or so. Pour in 2-3 tbsp water (just eyeball it) and fry until it gets soaked up and the beef is nice and juicy. Remove the filling and place in a bowl to cool (preferably at least until it stops steaming). Clean out the pan or get a fresh one ready.
- Lay half a wrap on a clean surface, and place a triangle of cheese in the centre of the wrap (make sure the side of the cheese and wrap are lined up). If you fold the bottom of the wrap over the cheese slice, both points should touch.
- Top the cheese with beef, then fold the bottom of the wrap over to cover the filling and press down. Fold the whole thing to the right then tuck in the top to seal the pocket shut (see step-by-step photos above and video below for reference). Repeat with the remaining pockets.
- Spray a large pan with oil and bring to a medium heat. Add half of the pockets and spray the tops with oil. Fry for 2-3 minutes each side until crispy. Repeat with the remaining pockets.
- For the sauce, just combine the sour cream with your preferred amount of sriracha. Top the pockets with the sauce and your favourite toppings, then tuck in and enjoy!
Video
Notes
- From fridge in the air fryer at 180C/350F for around 8 mins.
- From fridge in the oven at 180C/350F for around 10 mins.
- From frozen in the air fryer at 180C/350F for around 10 mins.
- From frozen in the oven at 180C/350F for around 12 mins.
Your Private Notes:
Nutrition
Looking for more?
You’ll find plenty more delicious comfort food like this in my Debut Cookbook ‘Comfy’