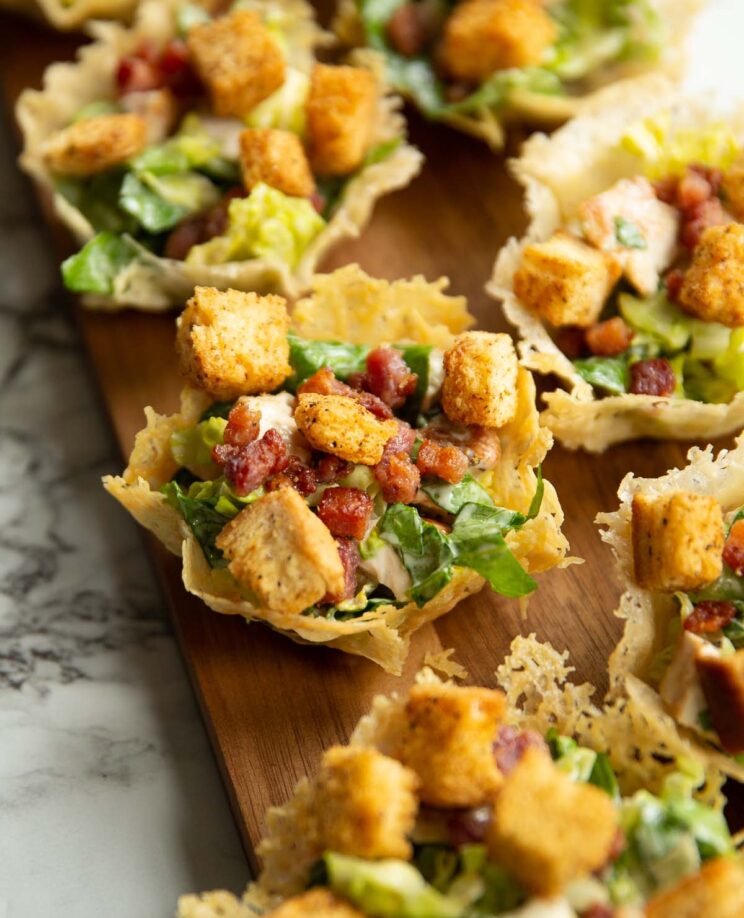
These mini parmesan cups are the perfect finger food for any occasion! They’re also loaded with a quick and ridiculously Caesar Salad.
I know, it’s fairly rare you see a salad on this site. But, these salad cups are 100% comfort food – trust me! Plus, just look how darn cute they are 🥰
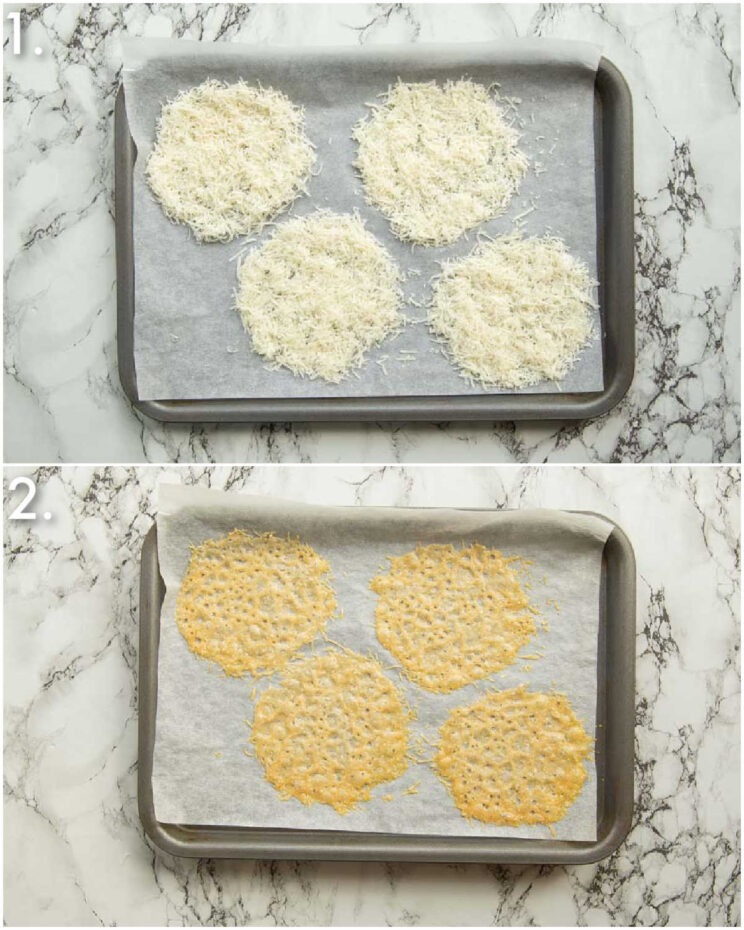
Parmesan Crisps
To make the parmesan cups you’re essentially just making parmesan crisps and moulding them into a cup shape.
If you’ve never made parmesan crisps before, I promise it couldn’t be easier! Just add some freshly grated parmesan to a baking tray lined with parchment paper. Make sure the mounds are around 3″ wide and aren’t touching each other.
How long to bake the parmesan for?
You want the parmesan to obviously melt, but not so much it turns deep golden and gets too crispy to mould. It’ll burn pretty quick so just keep an eye on it.
Parmesan Cups
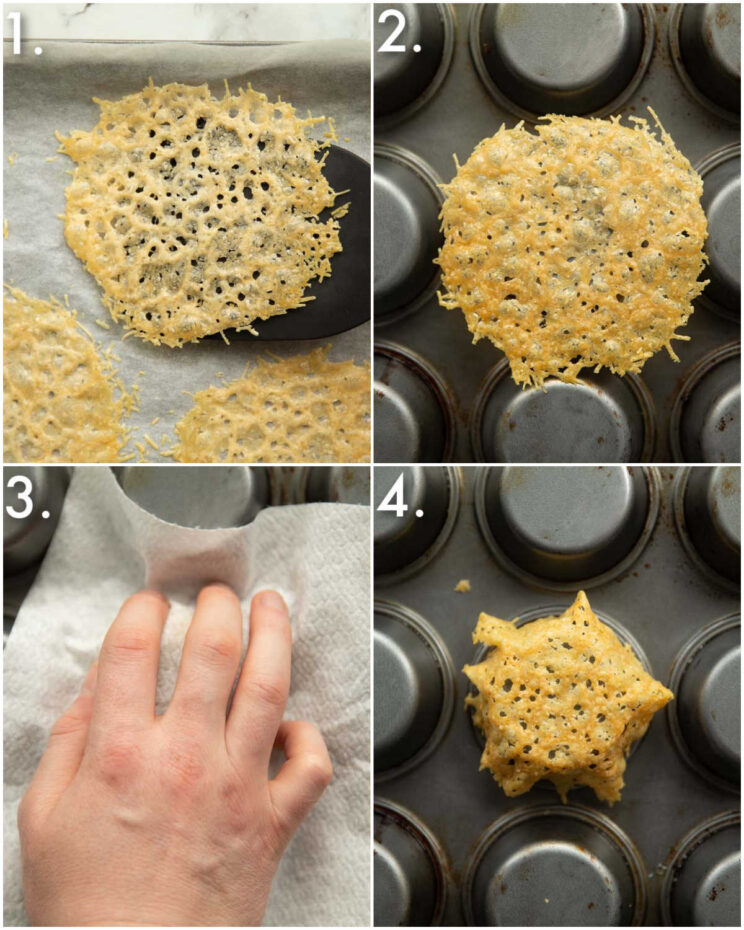
Once you’ve got the parmesan to a pliable state, you’ll want to form the cups. There’s a few different way to do this, but I find the easiest way is to press the parmesan crisp around the bottom of a muffin tray. Just grab a paper towel, place it on top and use your fingers to press the parmesan around the curve of the tray. The paper towel will act as a barrier between the heat, but will also soak up the grease.
Troubleshooting
- Parmesan keeps snapping – If you’re trying to mould the parmesan and it’s too brittle, it means it was either baked for slightly too long, or you’ve let it cool for too long (you need to work quick). You’ll need to pop it back in the oven to loosen it back up. You can either leave it on the upside down muffin tray and place it in the oven. From there it will melt and wrap itself around the tray. Or, just place it back on to the baking tray and pop in the oven for a min or so.
- Parmesan stuck to the muffin tray – Once the parmesan moulds it can sometimes stick. But, as it cools it’ll loosen up. Just very carefully wiggle it off.
In all cases I recommend testing with one cup, just to get a feel for timings etc.
Process shots: carefully lift parmesan crisp off tray (photo 1), add to upside down muffin tray (photo 2), use paper towel to carefully mould around tray (photo 3), remove paper towel (photo 4).
Caesar Salad Parmesan Cups
A Caesar salad is absolutely made for these cups, purely because of the parmesan aspect. You can make the salad anyway you fancy, I know people make Caesar salads in different ways. Personally I go for:
- Romaine Lettuce (a must)
- Caesar Dressing (a must)
- Croutons (a must)
- Chicken (optional)
- Pancetta (optional)
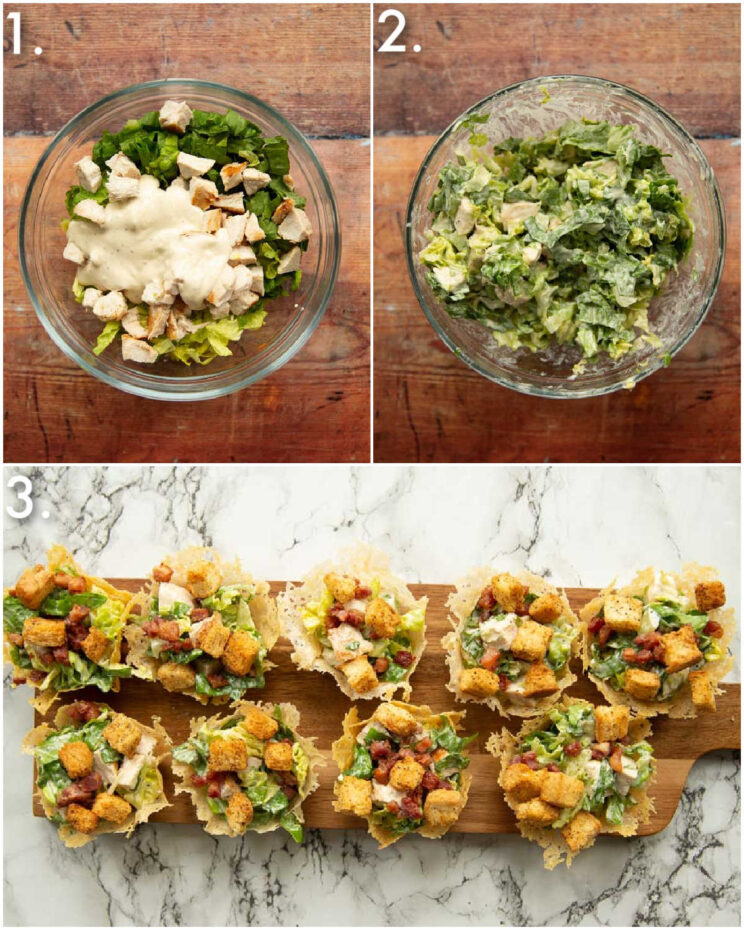
Process shots: add dressing, lettuce and chicken in bowl (photo 1), toss to combine (photo 2), add into cups then sprinkle with croutons and pancetta (photo 3).
Serving Caesar Salad Parmesan Cups
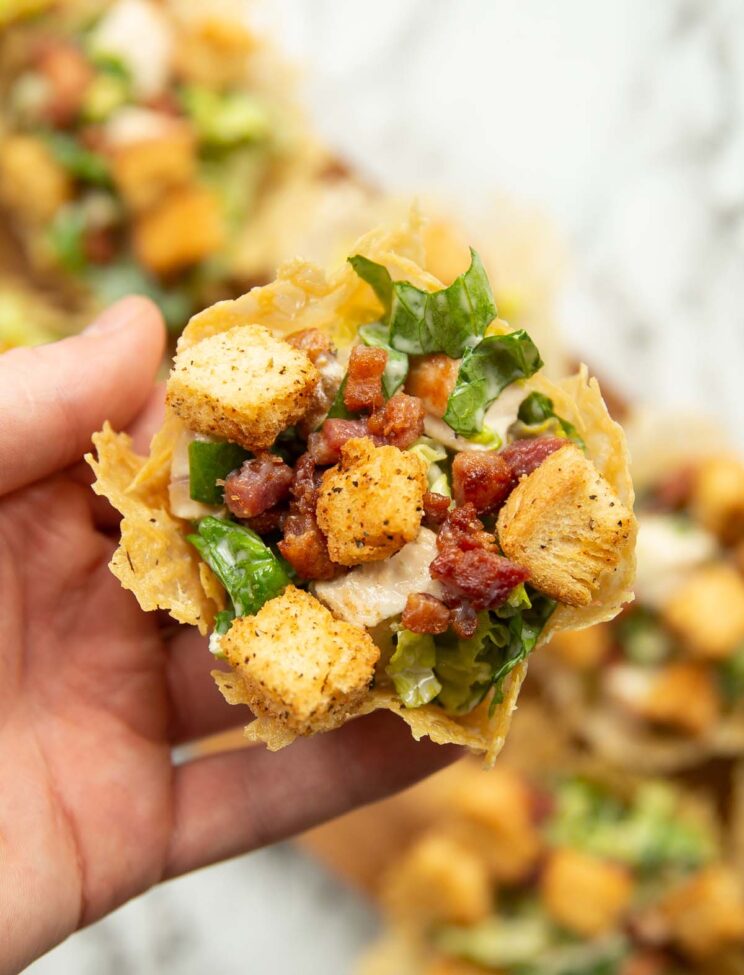
I usually mix the lettuce and chicken with the dressing, then to serve I sprinkle over the croutons and pancetta, just to keep them nice and crispy! These are awesome for a gathering of any kind and make the perfect finger food!
For more delicious edible cup recipes check out my Breakfast Toast Cups and Ham, Egg and Cheese Tortilla Cups!
For more Caesar salad goodness check out my Chicken Caesar Pasta Salad and Crispy Chicken Caesar Salad!
Alrighty, let’s tuck into the full recipe for these Parmesan Cups shall we!?
How to make Parmesan Salad Cups (Full Recipe & Video)

Caesar Salad Parmesan Cups
Equipment
- Large Baking Tray & Parchment Paper
- Plastic Spatula
- Muffin Tray
- Medium Sized Mixing Bowl & Salad Tossers
- Sharp Knife & Chopping Board
- Frying Pan (for chicken/pancetta)
- Fine Cheese Grater
- Paper Towels
Ingredients
- 5oz / 150g freshly grated Parmesan
- 1 head of Romaine Lettuce, chopped
- 1 cup / 60g Croutons (see notes)
- Caesar Salad Dressing, to preference
- 1 Chicken Breast grilled/fried & diced (optional)
- 3.5oz / 100g Pancetta or Bacon, diced (optional)
Instructions
- Pre heat oven to 180C/350F.
- Working in batches of 4 at a time, add a couple of tbsp of parmesan to a baking tray lined with parchment paper. Spread out to around 3" wide, making sure the circles don't touch each other.
- Bake in the oven for 4-5mins, or until the parmesan has melted and is just starting to turn golden. Remove from the oven and leave for 30 seconds, or until you're able to use a spatula to lift them. Try to work fairly quickly (see notes).
- Immediately place over an upside down muffin tray, place a sheet of paper towel over the top then gently mould the parmesan around the muffin hole. If you're struggling to form the cup without it breaking, leave the parmesan on the muffin hole and place it in the oven for a minute or so. It'll melt around the hole. Once it's cool enough to handle remove it and place to one side. Repeat process 2 more times with remaining parmesan.
- In a medium sized mixing bowl combine lettuce with a few dollops Caesar dressing and chicken. Start off conservatively with the dressing and work your way up so the salad doesn't drown. Divide between cups then top with pancetta and croutons. Enjoy!
Video
Notes
Your Private Notes:
Nutrition
Looking for more?
You’ll find plenty more delicious comfort food like this in my Debut Cookbook ‘Comfy’
If you loved this Salad Cup recipe then be sure to Pin it for later! Already made them or got a question? Give me a shout in the comments below and pick up your free ecookbook on the way!


question- how far ahead can I make the cups?
A few days in an airtight container should be absolutely fine! C.
Delish
Thanks, Daena! 🙂 C.