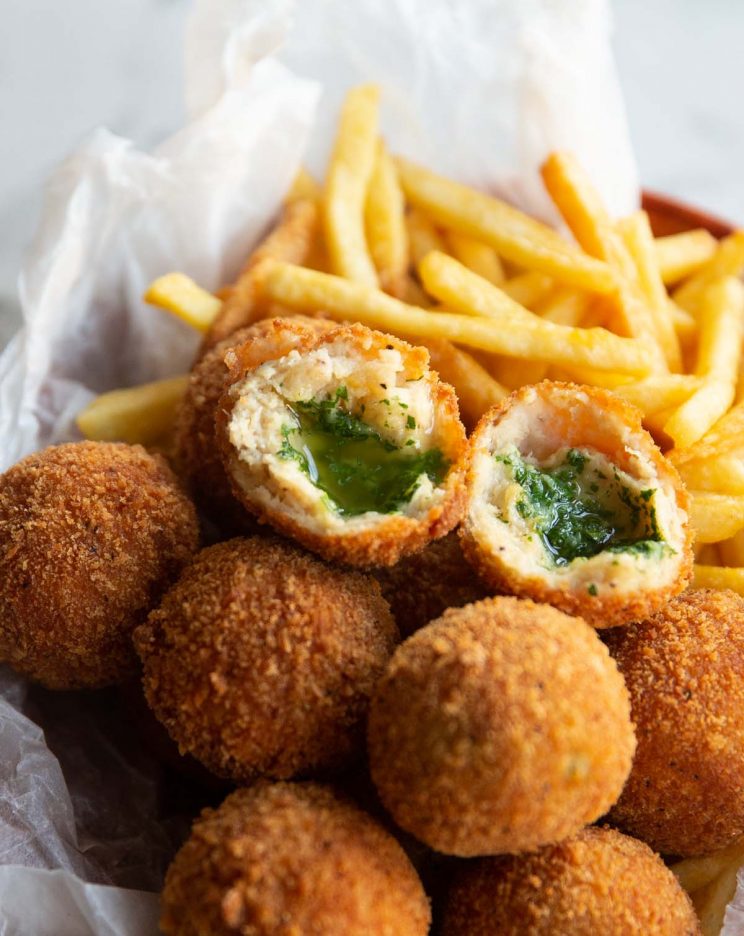
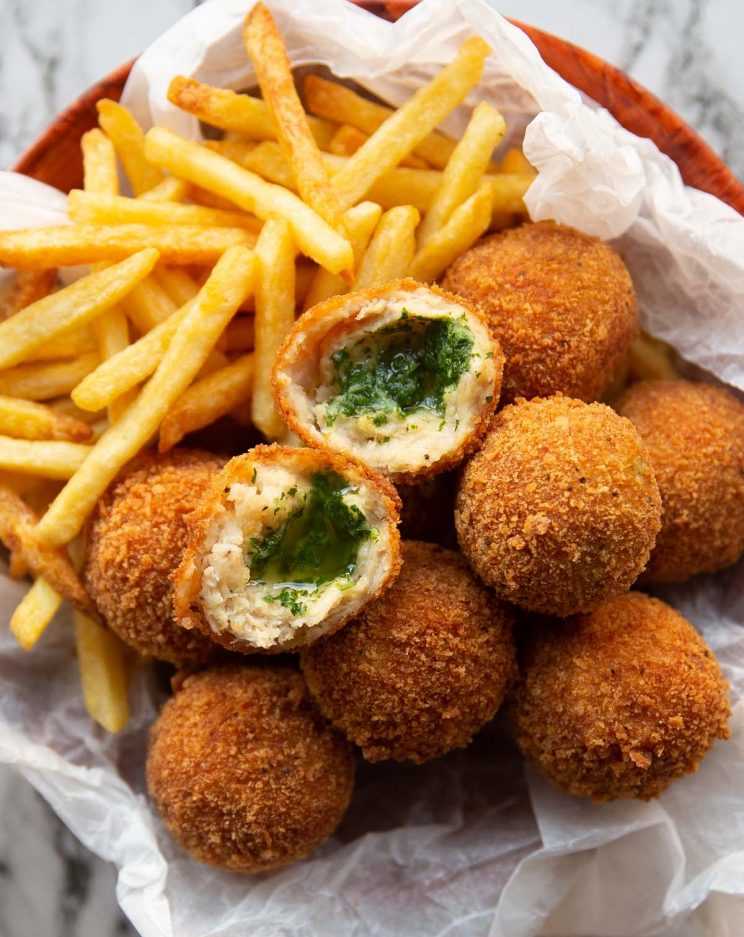
These Chicken Kiev Balls are ultra crispy on the outside and oozing with a gorgeous garlic butter!
If you’ve never tried mini kievs before you’re in for a treat! Think classic kiev, but smaller, cuter, crisper and more garlic butter. You’re gonna love em’. Follow me…
Garlic Butter
The garlic butter is the star of the show and it couldn’t be easier to make. Here’s what you’ll need:
Garlic Butter Ingredients
- Garlic – Fresh cloves and finely grated/minced. You only actually need two cloves, which I know doesn’t seem a lot, but raw grated garlic is very pungent!
- Butter – I use lightly salted butter, but you could use unsalted and adjust to taste if you wish.
- Parsley – Must be fresh and very finely diced.
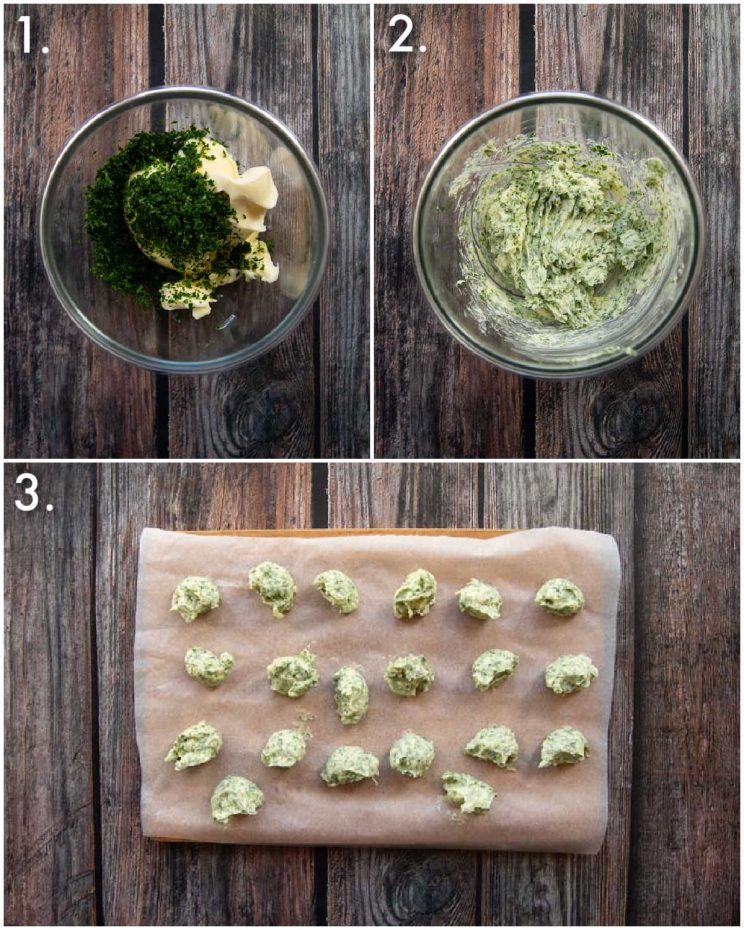
Once you’ve combined the butter just grab a teaspoon and scoop out small chunks onto some parchment paper. At this point you’ll want to freeze the butter balls to firm it up. It’s important the butter is nice and firm so you can wrap the meat around it.
Process shots: add butter, garlic & parsley to a bowl (photo 1), mash with fork to combine (photo 2), scoop onto parchment paper and freeze (photo 3).
How to Prepare Mini Chicken Kievs
Once you’ve frozen the butter you’re essentially just making stuffed chicken meatballs.
Ground Chicken
To make the meatballs you’ll want to use ground chicken (chicken mince in UK). If you can’t find it, you can pulse boneless skinless chicken thighs in a food processor. This works just as well! Alongside the chicken we’re going in with breadcrumbs to bind, parmesan for a punch of flavour, grated onion for moisture/flavour and an egg to bind.
Stuffed Meatballs
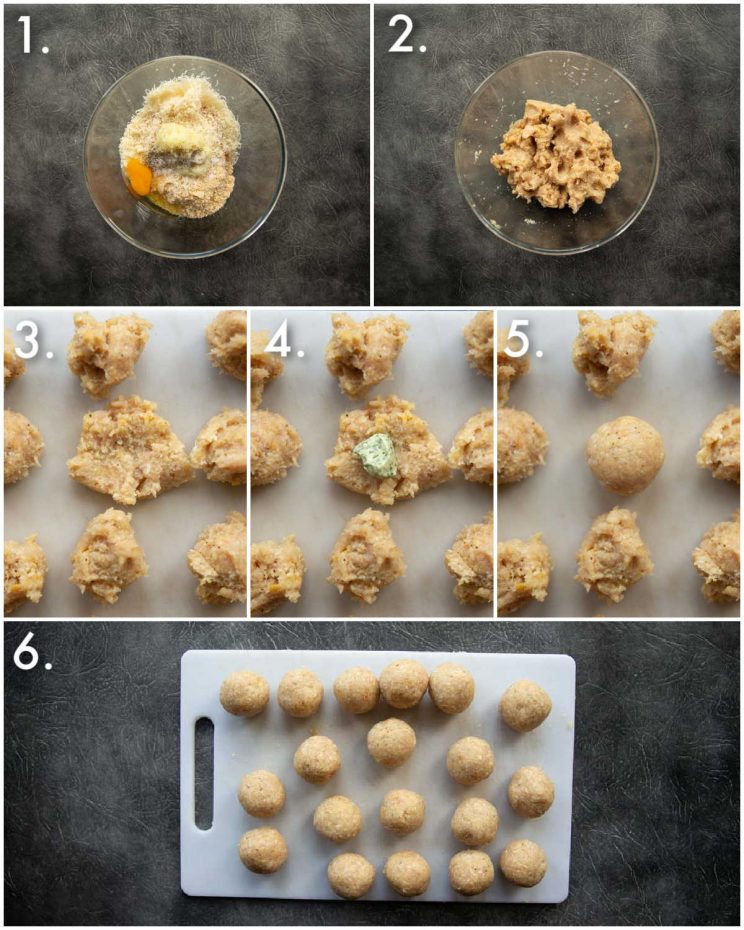
Once the garlic butter balls are nice and firm just scoop out chunks of meat, pop the butter in the centre and form the meat around the butter in the shape of a meatball.
Process shots: add meatball ingredients to large mixing bowl (photo 1), use your hand to combine until everything is evenly distributed (photo 2), scoop out chunks of meat (photo 3), add garlic butter ball to the centre (photo 4), form meatball around butter (photo 5), repeat (photo 6).
How to Coat Mini Chicken Kievs
A chicken kiev ain’t a chicken kiev unless it’s got a golden crispy coating. It’s just the rules 🤷♂️
Panko Breadcrumbs
Panko breadcrumbs are great because they’re so big and airy, meaning they turn out ultra crisp & crunchy. You’ll find them in most stores, so definitely opt for these over fresh or regular dried breadcrumbs if you can.
Wet Hand Dry Hand
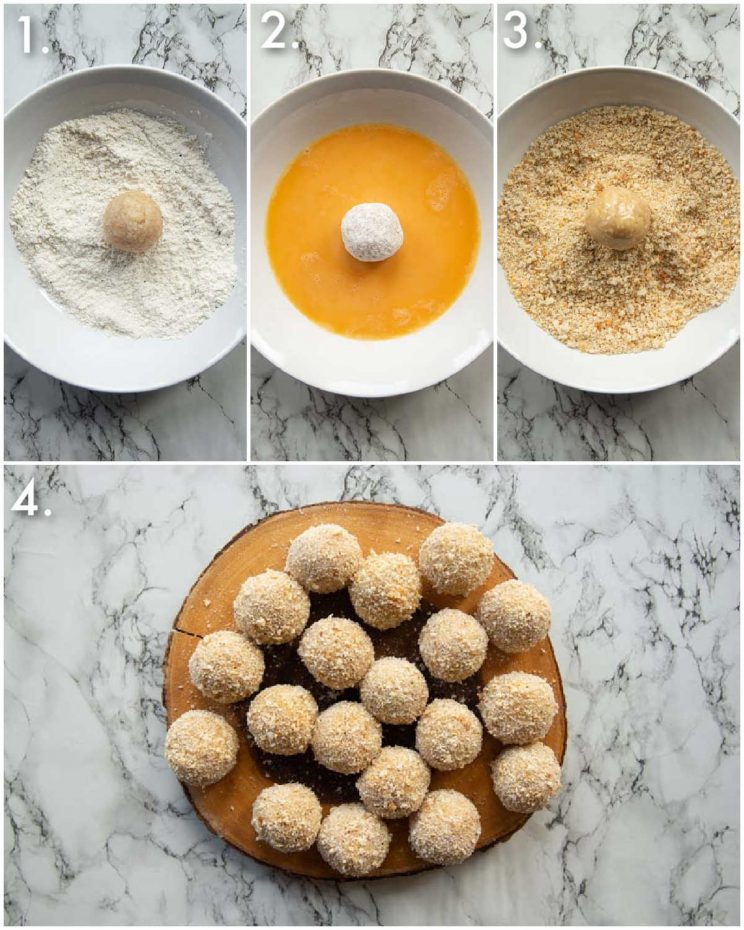
To reduce mess when dredging I recommend assigning a ‘wet hand’ to use when coating in the egg, and a ‘dry hand’ to coat in the flour/panko.
Process shots: coat in flour (photo 1), coat in egg (photo 2), coat in breadcrumbs (photo 3), repeat (photo 4).
How to Cook Mini Chicken Kievs
Now, when testing these beauties I did try two different methods of cooking:
Baked Mini Chicken Kievs
Baking is great for obviously reducing oil and also requires less effort. But, I found that the longer length of cooking time meant the butter leaked out of nearly all the kievs. Whilst they did come out fairly crispy, the coating just didn’t compared to when they’re fried.
Fried Mini Chicken Kievs
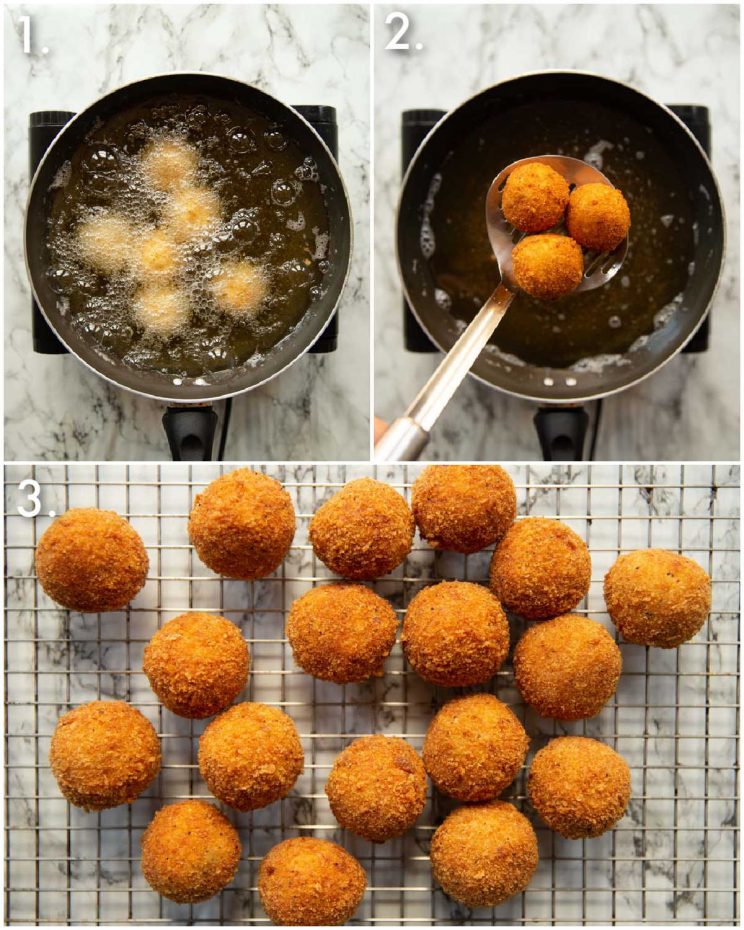
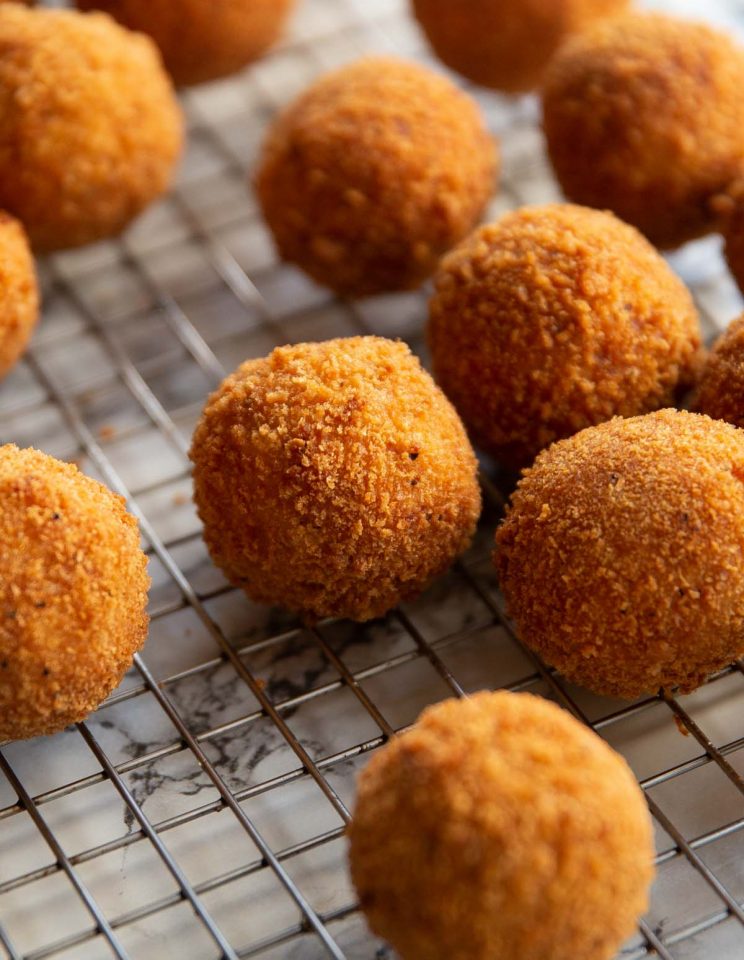
The shorter blast of intense heat allowed for the outside to crisp up and the same rate the chicken cooked and the butter melted in the centre. By this point I’ve made quite a few batches of these kievs and they’ve come out perfectly every single time when frying. Look how golden they come out!!
Process shots: add kievs to oil and deep fry (photo 1), scoop out with slotted spoon and repeat (photo 2), rest of wire rack (photo 3).
Serving Mini Chicken Kievs
You can either serve these as finger food or turn into a meal with a side. Growing up I always had these with fries and ketchup, so that’s exactly how I’ve served them today! Either way just give them a few mins to cool down or the butter will take the roof of your mouth off!
If you love the combo of garlic and chicken check out my Garlic Butter Chicken!
After another chicken kiev twist? Check out my Chicken Kiev Pasta!
For more similar recipes check out these beauties:
Fried Finger Food Recipes
Alrighty, let’s tuck into the full recipe for these mini chicken kievs shall we?!
How to make Mini Chicken Kievs (Full Recipe & Video)
Mini Chicken Kievs
Equipment
- Small Mixing Bowl & 1tsp Measuring Spoon (for garlic butter)
- Parchment Paper (for freezing garlic butter)
- Large Mixing Bowl & 1tbsp Measuring Spoon (for meatballs)
- 3 Shallow Bowls (for coating meatballs)
- Pot Suitable for Deep Frying & Slotted Spoon (for cooking kievs)
- Kitchen Thermometer (for deep frying)
- Wire Rack & Paper Towels (for resting kievs)
- Box Grater (for onion)
- Fine Cheese Grater (for parmesan)
Ingredients
Garlic Butter
- 4oz / 120g Lightly Salted Butter
- 2 tbsp very finely diced Fresh Parsley
- 2 cloves of Garlic, grated/minced
Meatballs
- 1lb / 500g Ground Chicken (see notes)
- 3/4 cup / 45g Panko Breadcrumbs (see notes)
- 1/2 cup / 40g freshly grated Parmesan
- 1 small White Onion, peeled & grated on a box grater
- 1 Egg
- 1/2 tsp Salt
- 1/4 tsp Black Pepper
Coating
- 1 cup / 60g Panko Breadcrumbs
- 1/3 cup / 70g Flour
- 2 Eggs, beaten
- Salt & Pepper, as needed
- 3-4 cups / 750ml-1litre Vegetable Oil (see notes)
Instructions
- Garlic Butter: In a small bowl add butter, parsley and garlic. Mash with a fork until evenly combined. Use a 1 tsp measuring spoon and scoop out the butter into 1 tsp portions on a sheet of parchment paper. You should get around 20 balls of butter. Place in the freezer for 30-60mins, or until nice and firm.
- Meatballs: Meanwhile in a large mixing bowl add chicken, 3/4cup breadcrumbs, parmesan, egg, onion and salt & pepper. Use your hand to combine until everything is evenly distributed, then use a 1 tbsp measuring spoon to scoop out chunks of meat. You should get around 20 chunks. Place a piece of garlic butter in the centre of the chunks of meat then roll into meatballs, ensuring the butter is contained.
- Coat: Line up 3 bowls - the first is flour with a pinch of salt and pepper, the second is 2 beaten eggs and the third is breadcrumbs with a pinch of salt and pepper. One by one coat the meatball in flour, then egg and finish in a good coating of breadcrumbs. Repeat with remaining meatballs.
- Fry: Heat up enough oil to comfortably cover the size of a kiev in a suitably sized pot. You want to temp to get to 175C/350F. Once you've reached that temp carefully lower in 5-6 kievs and fry for 4-5mins, or until deep golden and crispy. Place on wire rack with paper towels underneath to catch excess oil. Repeat with the other batches.
- Serve: Allow to cool for a few mins before tucking in as the butter is likely to be very hot. Serve up as finger food with a dip or with fries to make a meal!
Video
Notes
Your Private Notes:
Nutrition
Looking for more?
You’ll find plenty more delicious comfort food like this in my Debut Cookbook ‘Comfy’
If you loved this Mini Chicken Kiev Recipe then be sure to Pin it for later! Already made it or got a question? Give me a shout in the comments and pick up your free ecookbook along the way!


So delicious! My 4 yr old even loved them.
Great to hear! Thanks so much for the review 🙂 C.
This recipe is amazing – I’ve made them for my brother as we used to eat chicken kiev balls during games nights when we were younger.
Do you know how best to re-heat these? I’ve made a batch today but I won’t be eating them until Friday. I would presume in the oven at say 180 for 10-15 minutes?
Thank you!
Hey Dan, glad the recipe has gone down well! I too used to grow up on these! I haven’t ever reheated these but I think you’re bang on – that’s how I’d go about reheating them. C.
I have question a our freezing them do u freeze them after cooking or before
I haven’t tried freezing these before, but I imagine if you freeze them before cooking, then thaw in the fridge you could then just fry as instructed in the recipe 🙂
I made these last night and they were very tasty! My garlic butter did leak out in the cooking process but my family loved them! I will definitely make them again.
Glad they went down well, Donna! Shame to hear about the butter leaking out. I recommend working quick as you dredge the balls, just to ensure the butter is still close to frozen before they cook. Really try contain all the butter with the chicken and build up a nice crust to help seal any tiny holes where the butter may find it’s way out 🙂 Thanks so much for popping back for a review! Chris x
Totally delicious!!